The Royal Marines

 Articles  Comments Off on The Royal Marines
Jul 102020
 

The Royal Marines

The Corps of Royal Marines (RM) is an amphibious light infantry and also one of the five fighting arms of the Royal Navy. The marines can trace their origins back to the formation of the English Army’s “Duke of York and Albany’s maritime regiment of Foot” at the grounds of the Honourable Artillery Company on 28 October 1664.

As a highly specialised and adaptable light infantry force, the Royal Marines are trained for rapid deployment worldwide and capable of dealing with a wide range of threats. The Royal Marines are organised into a light infantry brigade (3 Commando Brigade) and a number of separate units, including 47 Commando (Raiding Group) Royal Marines, and a company strength commitment to the Special Forces Support Group. The Corps operates in all environments and climates, though particular expertise and training is spent on amphibious warfare, arctic warfare, mountain warfare, expeditionary warfare, and its commitment to the UK’s Rapid Reaction Forces.

Throughout its history, the Royal Marines have seen action in a number of major wars often fighting beside the British Army – including the Seven Years’ War, the Napoleonic Wars, the Crimean War, World War I and World War II. In recent times the Corps has been largely deployed in expeditionary warfare roles such as the Falklands War, the Gulf War, the Bosnian War, the Kosovo War, the Sierra Leone Civil War, the Iraq War and the War in Afghanistan. The Royal Marines have close international ties with allied marine forces, particularly the United States Marine Corps and the Netherlands Marine Corps (Dutch: Korps Mariniers). Today, the Royal Marines are an elite fighting force within the British Armed forces, having undergone many substantial changes over time.

History of the Royal Marines

The Royal Marines traces its origins back to 28 October 1664 when at the grounds of the Honourable Artillery Company “the Duke of York and Albany’s maritime regiment of foot” was first formed.

Early British Empire

On 5 April 1755, His Majesty’s Marine Forces, fifty Companies in three Divisions, headquartered at Chatham, Portsmouth, and Plymouth, were formed by Order of Council under Admiralty control.

Initially all field officers were Royal Navy officers as the Royal Navy felt that the ranks of Marine field officers were largely honorary. This meant that the furthest a Marine officer could advance was to lieutenant colonel. It was not until 1771 that the first Marine was promoted to colonel. This attitude persisted well into the 1800s. During the rest of the 18th century, they served in numerous landings all over the world, the most famous being the landing at Belle Île on the Brittany coast in 1761.

They also served in the American War of Independence, notably in the Battle of Bunker Hill led by Major John Pitcairn.

In 1788 a detachment of four companies of marines, under Major Robert Ross, accompanied the First Fleet to protect a new colony at Botany Bay (New South Wales). Due to an error the Fleet left Portsmouth without its main supply of ammunition, and were not resupplied until the Fleet docked in Rio de Janeiro midway through the voyage. Scholars such as Christopher Warren and Seth Carus argue that the Marines deliberately spread smallpox among Australia’s indigenous population in order to protect the settlement and respond to an overwhelming strategic threat. This incident does not appear in contemporaneous Marine or government records. Major Ross lost his papers during the shipwreck of HMS Sirius. Some researchers associate the indigenous smallpox outbreak with other causes.

In 1802, largely at the instigation of Admiral the Earl St Vincent, they were titled the Royal Marines by King George III. The Royal Marines Artillery (RMA) was formed as a separate unit in 1804 to man the artillery in bomb ketches. These had been manned by the Army’s Royal Regiment of Artillery, but a lawsuit by a Royal Artillery officer resulted in a court decision that Army officers were not subject to Naval orders. As RMA uniforms were the blue of the Royal Regiment of Artillery they were nicknamed the “Blue Marines” and the infantry element, who wore the scarlet uniforms of the British infantry, became known as the “Red Marines”, often given the semi-derogatory nickname “Lobsters” by sailors.A fourth division of the Royal Marines, headquartered at Woolwich, was formed in 1805.

During the Napoleonic Wars the Royal Marines participated in every notable naval battle on board the Royal Navy’s ships and also took part in multiple amphibious actions. Marines had a dual function aboard ships of the Royal Navy in this period; routinely, they ensured the security of the ship’s officers and supported their maintenance of discipline in the ship’s crew, and in battle, they engaged the enemy’s crews, whether firing from positions on their own ship, or fighting in boarding actions. In the Caribbean theatre volunteers from freed French slaves on Marie-Galante were used to form Sir Alexander Cochrane’s first Corps of Colonial Marines. These men bolstered the ranks, helping the British to hold the island until reinforcements arrived. This practice was repeated during the War of 1812, where escaped American slaves were formed into Cochrane’s second Corps of Colonial Marines. These men were commanded by Royal Marines officers and fought alongside their regular Royal Marines counterparts at the Battle of Bladensburg. Throughout the war Royal Marines units raided up and down the east coast of America including up the Penobscot River and in the Chesapeake Bay. They fought in the Battle of New Orleans and later helped capture Fort Bowyer in Mobile Bay in what was the last action of the war.

In 1855 the infantry forces were renamed the Royal Marines Light Infantry (RMLI). During the Crimean War in 1854 and 1855, three Royal Marines earned the Victoria Cross, two in the Crimea and one in the Baltic. In 1862 the name was slightly altered to Royal Marine Light Infantry. The Royal Navy did not fight any other ships after 1850 and became interested in landings by Naval Brigades. In these Naval Brigades, the function of the Royal Marines was to land first and act as skirmishers ahead of the sailor infantry and artillery. This skirmishing was the traditional function of light infantry. For most of their history, British Marines had been organised as fusiliers. In the rest of the 19th Century the Royal Marines served in many landings especially in the First and Second Opium Wars (1839–1842 and 1856–1860) against the Chinese. These were all successful except for the landing at the Mouth of the Peiho in 1859, where Admiral Sir James Hope ordered a landing across extensive mud flats.

The Royal Marines also played a prominent role in the Boxer Rebellion in China (1900), where a Royal Marine earned a Victoria Cross.

Status and roles

Through much of the 18th and 19th centuries Marine officers had a lower standing status than their counterparts in the Royal Navy. A short-lived effort was made in 1907, through the common entry or “Selborne scheme”, to reduce the professional differences between RN and RM officers through a system of common entry that provided for an initial period of shared training.

By the early twentieth century the Royal Marines had achieved a high professional status, although there was a serious shortage of junior officers. Numbering about 15,000 during the Edwardian era, enlistment for other ranks was for at least 12 years, with entitlement to a pension after 21 years of service. After basic training new recruits were assigned to one of three land-based divisions and from there to warships as vacancies arose.

From 1908 onwards one gun turret on each battleship was manned by RMA gunners. The RMLI continued their traditional role of providing landing parties and shore-based detachments. Specialist positions on board ship, such as postmen, barbers, lamp trimmers and butchers, were reserved for Royal Marines. After 1903 the Royal Marines provided bands for service on board battleships and other large vessels.

First World War

During the First World War, in addition to their usual stations aboard ship, Royal Marines were part of the Royal Naval Division which landed in Belgium in 1914 to help defend Antwerp and later took part in the amphibious landing at Gallipoli in 1915. It also served on the Western Front. The Division’s first two commanders were Royal Marine Artillery Generals. Other Royal Marines acted as landing parties in the Naval campaign against the Turkish fortifications in the Dardanelles before the Gallipoli landing. They were sent ashore to assess damage to Turkish fortifications after bombardment by British and French ships and, if necessary, to complete their destruction. The Royal Marines were the last to leave Gallipoli, replacing both British and French troops in a neatly planned and executed withdrawal from the beaches.

The Royal Marines also took part in the Zeebrugge Raid in 1918. Five Royal Marines earned the Victoria Cross in the First World War, two at Zeebrugge, one at Gallipoli, one at Jutland and one on the Western Front.

Between the wars

After the war Royal Marines took part in the allied intervention in Russia. In 1919, the 6th Battalion RMLI mutinied and was disbanded at Murmansk. The Royal Marine Artillery (RMA) and Royal Marine Light Infantry (RMLI) were amalgamated on 22 June 1923. Post-war demobilisation had seen the Royal Marines reduced from 55,000 (1918) to 15,000 in 1922 and there was Treasury pressure for a further reduction to 6,000 or even the entire disbandment of the Corps. As a compromise an establishment of 9,500 was settled upon but this meant that two separate branches could no longer be maintained. The abandonment of the Marine’s artillery role meant that the Corps would subsequently have to rely on Royal Artillery support when ashore, that the title of Royal Marines would apply to the entire Corps and that only a few specialists would now receive gunnery training. As a form of consolation the dark blue and red uniform of the Royal Marine Artillery now became the full dress of the entire Corps. Royal Marine officers and SNCO’s however continue to wear the historic scarlet in mess dress to the present day. The ranks of private, used by the RMLI, and gunner, used by the RMA, were abolished and replaced by the rank of Marine.

Second World War 

During the Second World War, a small party of Royal Marines were first ashore at Namsos in April 1940, seizing the approaches to the Norwegian town preparatory to a landing by the British Army two days later. The Royal Marines formed the Royal Marine Division as an amphibiously trained division, parts of which served at Dakar and in the capture of Madagascar. After the assault on the French naval base at Antsirane in Madagascar was held up, fifty Sea Service Royal Marines from HMS Ramilles commanded by Captain Martin Price were landed on the quay of the base by the British destroyer HMS Anthony after it ran the gauntlet of French shore batteries defending Diego Suarez Bay. They then captured two of the batteries, which led to a quick surrender by the French.

In addition the Royal Marines formed Mobile Naval Base Defence Organisations (MNBDOs) similar to the United States Marine Corps Defense Battalions. One of these took part in the defence of Crete. Royal Marines also served in Malaya and in Singapore, where due to losses they were joined with remnants of the 2nd Battalion of Argyll and Sutherland Highlanders at Tyersall Park to form the “Plymouth Argylls”.

The Royal Marines formed one Commando (A Commando) which served at Dieppe. One month after Dieppe, most of the 11th Royal Marine Battalion was killed or captured in an ill staged amphibious landing at Tobruk in Operation Agreement. Again, the Marines were involved with the Argyll and Sutherland Highlanders, this time the 1st Battalion. In 1942 the Infantry Battalions of the Royal Marine Division were re-organised as Commandos, joining the British Army Commandos. The Division command structure became a Special Service Brigade command. The support troops became landing craft crew and saw extensive action on D-Day in June 1944.

A total of four Special Service Brigades (redesignated Commando brigades in December 1944 as the “SS” abbreviation was unpopular) were raised during the war, and Royal Marines were represented in all of them. A total of nine RM Commandos (Battalions) were raised during the war, numbered from 40 to 48. 1 Commando Brigade had just one RM Battalion, No 45 Commando. 2 Commando Brigade had two RM battalions, Nos 40 and 43 Commandos. 3 Commando Brigade also had two, Nos 42 and 44 Commandos. 4 Commando Brigade was entirely Royal Marine after March 1944, comprising Nos 41, 46, 47 and 48 Commandos. 1 Commando Brigade took part in first in the Tunisia Campaign and then assaults on Sicily and Normandy, campaigns in the Rhineland and crossing the Rhine. 2 Commando Brigade was involved in the Salerno landings, Anzio, Comacchio, and operations in the Argenta Gap. 3 Commando Brigade served in Sicily and Burma. 4 Commando Brigade served in the Battle of Normandy and in the Battle of the Scheldt on the island of Walcheren during the clearing of Antwerp.

In January 1945, two further RM Brigades were formed, 116th Brigade and 117th Brigade. Both were conventional Infantry, rather than in the Commando role. 116th Brigade saw some action in the Netherlands, but 117th Brigade was hardly used operationally. In addition one Landing Craft Assault (LCA) unit was stationed in Australia late in the war as a training unit. In 1946 the Army Commandos were disbanded, leaving the Royal Marines to continue the Commando role (with supporting Army elements). A number of Royal Marines served as pilots during the Second World War. It was a Royal Marines officer who led the attack by a formation of Blackburn Skuas that sank the Königsberg. Eighteen Royal Marines commanded Fleet Air Arm squadrons during the course of the war, and with the formation of the British Pacific Fleet were well-represented in the final drive on Japan. Captains and Majors generally commanded squadrons, whilst in one case Lt Colonel R.C. Hay on HMS Indefatigable was Air Group Co-ordinator from HMS Victorious of the entire British Pacific Fleet.

Throughout the war Royal Marines continued in their traditional role of providing ships detachments and manning a proportion of the guns on Cruisers and Capital Ships. They also provided the crew for the UK’s Minor Landing craft, and the Royal Marines Armoured Support Group manned Centaur IV tanks on D Day; one of these is still on display at Pegasus Bridge.

Only one Marine (Corporal Thomas Peck Hunter of 43 Commando) was awarded the Victoria Cross in the Second World War for action at Lake Comacchio in Italy. Hunter was the most recent RM Commando to be awarded the medal. The Royal Marines Boom Patrol Detachment under Blondie Haslar carried out Operation Frankton and provided the basis for the post-war continuation of the SBS.

Post-colonial era

The Corps underwent a notable change after 1945 however, when the Royal Marines took on the main responsibility for the role and training of the British Commandos. The Royal Marines have an illustrious history, and since their creation in 1942 Royal Marines Commandos have engaged on active operations across the globe, every year, except 1968. Notably they were the first ever military unit to perform an air assault insertion by helicopter, during the Suez Crisis in 1956. They were also part of the land element during the 1982 Falklands War.

Cold War

During the Cold War the Royal Marines were earmarked to reinforce NATO’s northernmost command Allied Forces North Norway. Therefore, 3 Commando Brigade began to train annually in Northern Norway and had large stores of vehicles and supplies pre-positioned there. At the end of the Cold War in 1989 the structure of the Royal Marines was as follows:

Commandant General Royal Marines, London

3 Commando Brigade, Plymouth

40 Commando, Taunton

42 Commando, Bickleigh

45 Commando, Arbroath

29 Commando Regiment, Royal Artillery, Plymouth, one battery in Arbroath, (18× L118 light guns)

4 Assault Squadron, Plymouth (4× LCU Mk.9, 4× LCVP Mk.4, 2× Centurion BARV), served aboard HMS Fearless (L10)

539 Assault Squadron, Plymouth (4× LCU Mk.9, 4× LCVP Mk.4, 2× Centurion BARV), served aboard HMS Intrepid (L11)

59 Independent Commando Squadron, Royal Engineers, Plymouth, one troop in Arbroath

3 Commando Brigade Air Squadron, RNAS Yeovilton, (12× Gazelle AH.1, 6× Lynx AH.1)

2 Raiding Squadron, Royal Marines (Reserve), Plymouth

131 Independent Commando Squadron, Royal Engineers (V), Plymouth

289 Commando Battery, Royal Artillery (V), Plymouth (6× L118 light guns)

Special Boat Service, Poole, under operational control of United Kingdom Special Forces

Comacchio Group, HMNB Clyde, guarded HMNB Clyde and the UK’s naval nuclear weapons stored at RNAD Coulport

Royal Marines Police, Plymouth

Commando Training Centre Royal Marines, Lympstone

Royal Marines Band Service RMSoM, Deal

Royal Marines Reserve

RMR Plymouth, Plymouth

RMR Bristol, Bristol

RMR London, Wandsworth

RMR Merseyside, Liverpool

RMR Scotland, Edinburgh

RMR Tyne, Newcastle

“(V)” denotes British Army reserve units.

Personnel

The Royal Marines are part of the Naval Service and under the full command of Fleet Commander. The rank structure of the corps is similar to that of the British Army with officers and other ranks recruited and initially trained separately from other naval personnel. Since 2017 women have been able to serve in all roles in the Royal Marines. On average, 1,200 recruits attend training courses at the Commando Training Centre Royal Marines every year.

At its height in 1944 during the Second World War, more than 70,000 people served in the Royal Marines. Following the Allied victory the Royal Marines were quickly reduced to a post-war strength of 13,000. When National Service finally came to an end in 1960, the Marines were again reduced, but this time to an all Commando-trained force of 9,000 personnel. As of October 2014 the Royal Marines had a strength of 7,760 Regular and 750 Royal Marines Reserve, giving a combined component strength of around 8,510 personnel. The Royal Marines are the only European marine force capable of conducting amphibious operations at brigade level.

List of equipment of the Royal Marines

Infantry The basic infantry weapon of the Royal Marines is the L85A2 assault rifle, sometimes fitted with the L123A3 underslung grenade launcher. Support fire is provided by the L110A1 light machine gun,[the L7A2 General Purpose Machine Gun (GPMG) and the L111A1 heavy machine gun (which is often mounted on an armoured vehicle); indirect fire by the L16A2 81mm mortar. Sniper rifles used include the L115A3, produced by Accuracy International. More recently the L129A1 has come into service as the designated marksman rifle. Other weapons include the Javelin Anti-Tank missile, the L131A1 pistol and the Fairbairn-Sykes Fighting Knife. The Royal Marines will replace all their L85 rifles with a variant of the L119, a variant of the C8SFW.

Armour The Royal Marines maintain no heavy armoured units, instead, they operate a fleet of lightly armoured and highly mobile vehicles intended for amphibious landings or rapid deployment. The primary armoured fighting vehicle operated by the Armoured Support Group is the BvS 10 Viking All Terrain Armoured Vehicle. Other, lighter vehicles include the Land Rover Wolf Armoured Patrol Vehicle, the Jackal (MWMIK) Armoured Vehicle and the Pinzgauer High Mobility All-Terrain Vehicle.

Artillery Field artillery support is provided by 29th Commando Regiment Royal Artillery of the British Army using the L118 Light Gun, a 105 mm towed howitzer. The regiment is Commando-trained.

Aviation The Commando Helicopter Force of the Fleet Air Arm provides transport helicopters in support of the Royal Marines. It currently uses both Merlin HC4/4A medium-lift transport and Wildcat AH1 attack helicopters to provide direct aviation support for the Corps. In addition, the Royal Air Force provides Chinook heavy-lift and Puma HC2 medium-lift transport helicopters.

Vessels The Royal Marines operate a varied fleet of military watercraft designed to transport troops and materiel from ship to shore or conduct river or estuary patrols. These include the 2000TDX Landing Craft Air Cushion, the Mk10 Landing Craft Utility, the Mk5 Landing Craft Vehicle Personnel and the SDV Mk8 Mod 1 Swimmer Delivery Vehicle for special forces. Other smaller amphibious craft such as the Offshore Raiding Craft, Rigid Raider and Inflatable Raiding Craft are in service in much greater numbers.

Formation and Structure

The overall head of the Royal Marines is Her Majesty Queen Elizabeth II, in her role as Commander-in-Chief of the British Armed Forces. The ceremonial head of the Royal Marines is the Captain General Royal Marines (equivalent to the Colonel-in-Chief of a British Army regiment). Full Command of the Royal Marines is vested in the Fleet Commander (FLTCDR) with the Commandant General Royal Marines, a major-general, embedded within the Navy Command Headquarters (NCHQ) as Commander UK Amphibious Force (COMUKAMPHIBFOR).

The operational capability of the corps comprises a number of battalion-plus sized units, of which five are designated as “commandos”:

Commando Infantry

40 Commando, Royal Marines (known as Forty Commando) based at Norton Manor Barracks, Taunton, Somerset, England

42 Commando, Royal Marines (known as Four Two Commando) based at Bickleigh Barracks, Plymouth, Devon, England

45 Commando, Royal Marines (known as Four Five Commando) based at RM Condor, Arbroath, Angus, Scotland

Maritime Security

43 Commando Fleet Protection Group, Royal Marines based at HM Naval Base Clyde, Helensburgh, Argyll and Bute (previously Comacchio Group).

Intelligence, Surveillance and Target Acquisition

30 Commando (Information Exploitation) Group, Royal Marines[59] based at Stonehouse Barracks, Plymouth

Raiding and Assault

47 Commando (Raiding Group), Royal Marines based at RM Tamar, Devonport (previously 1 Assault Group RM)

Royal Marines Armoured Support Group (RMASG) is an element of the Royal Marines that operates the Viking BvS 10 All Terrain Vehicle. It is based at RNAS Yeovilton in Somerset, and is part of 539 Raiding Squadron.

Logistic Support

Commando Logistic Regiment based at RM Chivenor, Devon

Special Forces

Special Boat Service based at RM Poole, Dorset (although Full Command is retained by CINCFLEET, Operational Command of SBS RM is assigned to Director Special Forces).

With the exception of the 43 Commando Fleet Protection Group and Commando Logistic Regiment, which are each commanded by a full colonel, each of these units is commanded by a lieutenant-colonel of the Royal Marines, who may have sub-specialised in a number of ways throughout their career.

3 Commando Brigade

Operational command of the five commandos and the Commando Logistics Regiment is delegated to 3 Commando Brigade Royal Marines, of which they are a part. Based at Stonehouse Barracks, the brigade exercises control as directed by either CINCFLEET or the Permanent Joint Headquarters. As the main combat formation of the Royal Marines, the brigade has its own organic capability to it in the field, 30 Commando Information Exploitation Group, a battalion sized formation providing information operations capabilities, life support and security for the Brigade Headquarters.

43 Commando Fleet Protection Group Royal Marines, responsible for the security of the United Kingdom’s nuclear deterrent and other security-related duties was originally outside the brigade, but was incorporated into it from April 2012. It also provides specialist boarding parties and snipers for the Royal Navy worldwide, for roles such as embargo enforcement, counter-narcotics, counter-piracy and counter-insurgency activities of the Royal Navy. It is the largest unit in the brigade, at 790 strong.

The independent elements of the Royal Marines are:

Commando Training Centre: This is the training unit for the entire corps, and consists of three separate sections:

Commando Training Wing: This is the initial basic commando training section for new recruits to the Royal Marines, and the UK Forces All Arms Commando Course.

Specialist Wing: This provides specialist training in the various trades which Marines may elect to join once qualified and experienced in a Rifle Company.

Command Wing: This provides command training for both officers and NCOs of the Royal Marines.

47 Commando (Raiding Group) Royal Marines: Provides training in the use of landing craft and boats, and also serves as a parent unit for the three assault squadrons permanently embarked on the Royal Navy’s amphibious ships.

4 Assault Squadron—HMS Bulwark

Special Boat Service (SBS) are naval special forces and under operational command of Director Special Forces, UK Special Forces Group. It is commanded by a lieutenant colonel qualified as a swimmer canoeist. SBS responsibilities include water-borne operations, maritime counter-terrorism and other special forces tasks.

Royal Marines Band Service provides regular bands for the Royal Navy and provides expertise to train RN Volunteer Bands. Musicians have an important secondary roles as medics, field hospital orderlies, CBRN specialists and any other roles that may be required of them. Personnel may not be commando trained, usually wearing the dark blue beret instead of green; until 2017, the band service was the only branch of the Royal Marines to admit women.

Commando 21

40 and 45 Commando are each organised into six companies, further organised into platoon-sized troops, as follows:

Command company

Main HQ

Tactical HQ

Reconnaissance Troop with a sniper section

Mortar Troop

Anti-Tank (AT) Troop

Medium Machine Gun Troop

2× Close Combat Companies

Company Headquarters

3× Close Combat Troops

2× Stand Off Companies

Company Headquarters

Heavy Machine Gun (HMG) Troop

AT Troop

Close Combat Troop.

Logistic Company

A Echelon 1

A Echelon 2

FRT (Forward Repair Team)

RAP (Regimental Aid Post)

B Echelon

In general a rifle company Marine will be a member of a four-man fire team, the building block of commando operations. A Royal Marine works with their team in the field and shares accommodation if living in barracks. This structure is a recent development, formerly Commandos were structured similarly to British Army light Infantry Battalions.

Amphibious Task Group

Formerly known as the Amphibious Ready Group, the Amphibious Task Group (or ATG) is a mobile, balanced amphibious warfare force, based on a Commando Group and its supporting assets, that can be kept at high readiness to deploy into an area of operations. The ATG is normally based around specialist amphibious ships, most notably HMS Ocean, the largest ship in the British fleet. Ocean was designed and built to accommodate an embarked commando and its associated stores and equipment. The strategy of the ATG is to wait “beyond the horizon” and then deploy swiftly as directed by HM Government. The whole amphibious force is intended to be self-sustaining and capable of operating without host-nation support. The concept was successfully tested in operations in Sierra Leone.

Commando Helicopter Force

The Commando Helicopter Force (CHF) forms part of the Fleet Air Arm. It comprises three helicopter squadrons and is commanded by the Joint Helicopter Command.[66] It consists of both Royal Navy (RN) and Royal Marines personnel. RN personnel need not be commando trained. The CHF is neither under the permanent control of 3 Commando Brigade nor that of the Commandant General Royal Marines, but rather is allocated to support Royal Marines units as required. It uses both Merlin HC4/4A medium-lift and Wildcat AH1 light transport/reconnaissance helicopters to provide aviation support for the Royal Marines.

Commando Forces 2030, Maritime Operations Commando & Future Commando Force

On 11 April 2017 the First Sea Lord, Admiral Sir Philip Jones, announced that the Royal Marines were to be restructured. The Royal Marines will be able to deploy a specialist Maritime Operations Commando from the three combat units as part of the Commando Forces 2030 strategy. A Future Commando Force (FCF) programme has been set up under Navy Command to create the staff and intellectual horsepower for a land littoral strike division programme. An example of the FCF was depicted by young engineering graduates from the UK Naval Engineering Science and Technology forum (UKNEST).

There will be two Littoral Response Groups: One based East of Suez, one based in the High North.
On 27 June 2020, the Royal Marines announced they will adopt a new uniform with the MultiCam camoflauge instead of the MTP camo.

Selection and training

Royal Marines are required to undergo one of the longest and most physically demanding specialist infantry training regimes in the world. Recruit training lasts for 32 weeks for Marines and 60 weeks for officers. Potential recruits must be aged 16 to 32 (18 to 25 for Commissioned Officers) and must undertake a series of interviews, medical tests, an eye/sight test, psychometric tests and a PJFT (Pre-joining fitness test). As of late 2018 there is no restriction on women joining the Royal Marines.

Once a potential recruit passes these, enlisted recruits undertake a 3-day selection course called PRMC (Potential Royal Marine Course) and potential officers undertake POC (Potential Officer Course) – both take place at the Commando Training Centre Royal Marines (CTCRM) in Lympstone, Devon. Officers must also take the Admiralty Interview Board (AIB). Upon passing the 3-day course, recruits then start basic recruit training (RT) at CTCRM. A large proportion of training is carried out on Dartmoor’s inhospitable terrain and Woodbury Common woodland.

Throughout the recruit training, Royal Marines learn and develop many military skills such as weapons handling, marksmanship and proficiency with different firearms, personal administration, marching and parade ground skills, map reading and navigation, physical fitness and mental toughness development, fieldcraft skills such as camouflage and stalking, basic survival techniques, patrolling and sentry duty development, unarmed and armed close quarters combat (CQC), first aid, underwater escape, chemical biological radiological nuclear (CBRN) training, military communications and signals, teamwork skills, amphibious landings training, and leadership skills for officers to name a few.

The best recruit to finish training is awarded the Kings Badge. King George V directed that his Royal Cypher, surrounded by a laurel wreath, would be known as the King’s Badge, and would be awarded to the best all round recruit in the King’s Squad, provided that he was worthy of the honour. The badge was to be carried on the left shoulder, and worn in every rank. The King’s Badge is not awarded to every squad, and is only presented if a recruit measures up to the very exacting standards required.

Throughout their career, a Marine can specialise in a number of different roles upon completion of their respective courses after spending 1–2 years as a general duties (GD) Marine. Examples of some specialisations and different courses includes the mountain leader (ML), physical training instructor (PTI), Assault Engineer (AE), Royal Marines police (RMP), sniper (S), medical assistant (MA), pilot, reconnaissance operator (RO), drill instructor (DL), driver (D), clerk (C), signaller (SI), combat intelligence (CI), armourer (A), and heavy weapons (HW). Royal Marines can also apply for swimmer canoeist/Special Boat Service selection (SBS) or any other branch of the UKSF. All Royal Marines will also conduct training exercises on differing military skills on a regular basis including development in mountain, arctic, jungle, amphibious and desert warfare. They can also be involved in exchange training programs with other countries’ forces – particularly the United States Marine Corps and the Netherlands Marine Corps/Korps Mariniers.

Museum

The Royal Marines Museum (established in October 1958) is an institution dedicated to the history of the Royal Marines. In 2011, it became part of the National Museum of the Royal Navy, which has since been the executive public body of the museum in the Ministry of Defence. It will soon be moving from Eastney Barracks to Portsmouth Dockyard.

Customs and traditions

The Royal Marines have a proud history and unique traditions. With the exceptions of “Gibraltar” and the laurel wreath for the Battle of Belle Island, their colours (flags) do not carry battle honours in the manner of the regiments of the British Army or of the US Marine Corps, but rather the “globe itself” as a symbol of the Corps.

The heraldic crest of the Royal Marines commemorates the history of the Corps. The Lion and Crown denotes a Royal regiment. King George III conferred this honour in 1802 “in consideration of the very meritorious services of the Marines in the late war.” The “Great Globe itself” was chosen in 1827 by King George IV in place of Battle honours to recognise the Marines’ service and successes in multiple engagements in every quarter of the world. The laurels are believed to honour the gallantry they displayed during the investment and capture of Belle Isle, off Lorient, in April–June 1761. The word Gibraltar refers to the Capture of Gibraltar by a force of Anglo-Dutch Marines in 1704 and the subsequent defence of the strategic fortress throughout a nine-month siege against a numerically superior Franco-Spanish force. Their determination and valour throughout the siege led to a contemporary report published in The Triumphs of Her Majesty’s Arms in 1707 to announce:

Encouraged by the Prince of Hesse, the garrison did more than could humanly be expected, and the English Marines gained an immortal glory

— referred to by Paul Harris Nicolas, Historical Record of the Royal Marine Forces

There are no other battle honours displayed on the colours of the four battalion-sized units of the current Corps. The Latin motto “Per Mare Per Terram” translates into English as “By Sea By Land”. Believed to have been first used in 1775, this motto describes the Royal Marines ability in fighting both afloat on-board ships of the Royal Navy as well as ashore in their many land engagements. The fouled anchor, incorporated into the emblem in 1747, is the badge of the Lord High Admiral, and shows that the Corps is part of the Naval Service.

The regimental quick march of the Corps is “A Life on the Ocean Wave”, while the slow march is the march of the Preobrazhensky Regiment, awarded to the Corps by Admiral of the Fleet Earl Mountbatten of Burma on the occasion of the Corps’s tercentenary in 1964. Lord Mountbatten was Life Colonel Commandant of the Royal Marines until his murder by the IRA in 1979.

The Royal Marines are allowed by the Lord Mayor of the City of London to march through the City as a regiment in full array. This dates to the charter of Charles II that allowed recruiting parties of the Admiral’s Regiment of 1664 to enter the City with drums beating and colours flying.

Uniforms

The modern Royal Marines retain a number of distinctive uniform items. These include the green “Lovat” service dress worn with the green beret, the dark blue parade dress worn with either the white Wolseley Pattern Helmet (commonly referred to as “pith helmet”) or white and red peaked cap, the scarlet and blue mess dress for officers and senior non-commissioned officers and the white hot-weather uniform of the Band Service.

Associations with other regiments and marines corps

Argyll and Sutherland Highlanders

Early connections date from Balaclava in the Crimean War and Lucknow during the Indian Rebellion of 1857, but the main association stems from World War II. In July 1940, after the fall of Dunkirk, the 5th Battalion, Argyll and Sutherland Highlanders served with the Royal Marine Brigade for over a year. When the battleships HMS Prince of Wales and HMS Repulse were sunk in December 1941, the Royal Marines survivors joined up with the remnants of the 2nd Battalion, in the defence of Singapore. They formed what became known as ‘The Plymouth Argylls’, after the association football team, since both ships were Plymouth manned. Most of the Highlanders and Marines who survived the bitter fighting were taken prisoner by the Japanese.

The Royal Marines inter-unit rugby football trophy is the ‘Argyll Bowl’, presented to the Corps by the Regiment in 1941.

Princess of Wales’s Royal Regiment

The fore-bearer regiments of the Princess of Wales’s Royal Regiment, 31st (Huntingdonshire) Regiment of Foot was initially raised as amphibious troops. They served as Marines for a period. To this day one officer from the Royal Marines serves with the PWRR and Vice Versa. Also the Royal Marine Lanyard is worn by all ranks in Service Dress and Number 2 Dress uniform and barrack dress of PWRR.

Barbados Defence Force

Close links have existed between the Royal Marines and the Barbados Defence Force since 1985 when a bond was established following a series of cross-training exercises in the Caribbean. The Alliance was approved by HM the Queen in 1992.

Netherlands Marine Corps

The Royal Marines have close links with the Royal Netherlands Marine Corps, with whom they conduct NATO exercises throughout the year. Formed during the Anglo-Dutch Wars in 1665, the Dutch Marines distinguished themselves in raids on the English coast, where it is likely they met their future counterparts.

Units of the Royal Netherlands Marine Corps work in close co-operation with 3 Commando Brigade of the Royal Marines. Operational units of the Royal Netherlands Marine Corps are fully integrated into this brigade. This integration is known as the United Kingdom-Netherlands Landing Force and is a component of the United Kingdom-Netherlands Amphibious Force as a key strike force during the Cold War to strengthen the Nordic area.

French 9th Marine Infantry Brigade (former 9th Light Armoured Marine Brigade)

The 9th Marine Infantry Brigade (9e Brigade d’Infanterie de Marine, 9e BIMa) is a Marine infantry brigade which is one of the two designated amphibious brigades in France. It is unique in being the only ‘All Marine’ Brigade in the French Army; the other amphibious brigade, 6th Light Armoured Brigade (6e Brigade Légère Blindée, 6e BLB), is composed of a mix of cap badges.

9e BIMa is also a light armoured brigade, formed of two Marine infantry regiments (2e RIMa and 3e RIMa — Régiments d’Infanterie de Marine) and a tank battalion.

Sourced from Wikipedia. 

The Hampshire Regiment

 Articles  Comments Off on The Hampshire Regiment
Jul 062020
 

The Hampshire Regiment

Formation of the North and South Hampshire Militia, 1757

The roots of the militia go back to Anglo Saxon days when all able-bodied freemen were required to take part in the defence of the country – defence of the realm.

A convenient marker point to positively identify the county’s (Southampton) Militia was the Militia Act of Charles II in 1661 which acknowledged emphatically the King’s sole right to control the Militia – this act provided for the levying of the Militia by the Lords Lieutenant and for its organisation by Companies and Regiments.

During the Monmouth Rebellion the Hampshire Militia actually took to the field. During the 7 Years War in August 1757 a bill for the re-organisation of the Militia received Royal Assent for the raising of 60,000 men by ballot for service within Great Britain only.

Hampshire’s contingent was to be two Regiments: North Hants and the South Hants: Headquarters and embodiment taking place at Winchester and Southampton respectively. A Major Gibbon and his son Captain Gibbon were appointed in 1759 to the South Hants Militia – Captain Gibbon later becoming the famous Roman historian of ‘The Decline and fall of the Roman Empire’.

For a Sergeants clothing £2 4s 7d was allocated per annum, for other men £1 0s 5d, fresh clothing being issued every three years in peace. In war time the Militia were liable to permanent embodiment, in peace they were called out annually for one month’s training. During the 7 Years war both Regiments were embodied for the period 1759-1762.

During the Napoleonic Wars the Hampshire Militia were again embodied, this time for nearly 11 years – 1792-1802.

In June 1811 the South Hants became Light Infantry. In 1853 the North and South Hants Militia amalgamated – Winchester becoming their focal point for annual training.
In 1881 the Hampshire Militia was re-designated the 3rd (Militia Battalion the Hampshire Regiment.

The North Hants Militia – 1757

The South Hants Militia – 1757

The Isle of Wight Militia

The South West Hants Militia Regiment 1808-1816

The South East Hants Militia Regiment 1808-1816

The Hampshire Militia – 1853

3rd (Militia) Battalion The Hampshire Regiment – 1881

3rd (Special Reserve) Battalion The Hampshire Regiment – 1908-1914-18

The Duke of Connaught’s Own Hampshire and IOW Artillery

The Hampshire Militia Regiment

The Isle of Wight Militia Regiment.

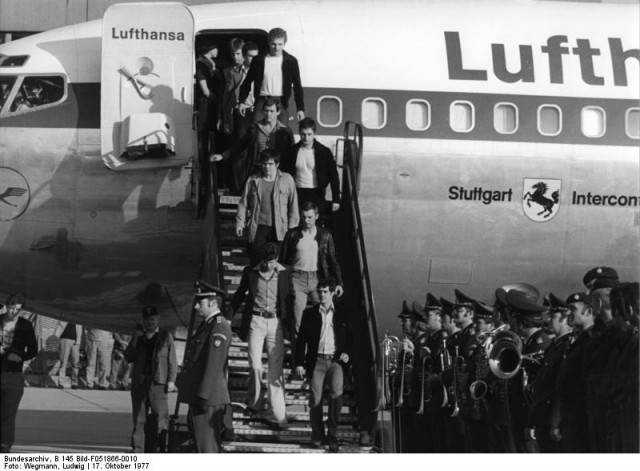
The Hampshire Regiment was a line infantry regiment of the British Army, created as part of the Childers Reforms in 1881 by the amalgamation of the 37th (North Hampshire) Regiment of Foot and the 67th (South Hampshire) Regiment of Foot. The regiment existed continuously for 111 years and served in the Second Boer War, World War I and World War II. In 1946, due to distinguished service in World War II, the regiment was retitled as the Royal Hampshire Regiment.

On 9 September 1992, after over 111 years of service, the Royal Hampshire Regiment was amalgamated with the Queen’s Regiment to form a new large regiment, the Princess of Wales’s Royal Regiment, which continues the traditions of the Royal Hampshires.

Formation and antecedents

The Hampshire Regiment was formed on 1 July 1881 under the Childers reforms from the merger of the 37th (North Hampshire) Regiment of Foot and the 67th (South Hampshire) Regiment of Foot along with the militia and rifle volunteers of the county of Hampshire. As part of the formation of the regiment, the following Volunteer Force and Militia units were placed under command of the regiment:

3rd (Hampshire Militia) Battalion based in Winchester

(4th)1st Volunteer Battalion based in Winchester, former 1st Hampshire Rifle Volunteers

(5th)2nd Volunteer Battalion based in Southampton, former 2nd Hampshire Rifle Volunteers

(6th) 3rd Volunteer Battalion based in Portsmouth, former 3rd Hampshire Rifle Volunteers

(7th) 4th Volunteer Battalion based in Newport, former 1st Isle of Wight Rifle Volunteers
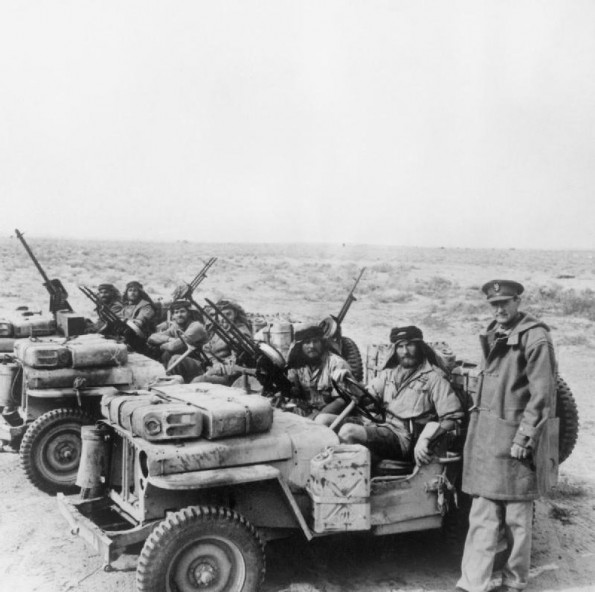
Second Boer War

At the turn of the 20th century, there were two regular battalions of the regiment. The 1st battalion was stationed at Malta from 1884, then transferred to British India where it had various postings. In early 1903 the battalion transferred from Lucknow to Aden. In April 2004 three companies were attached to the Royal Navy and saw service in the Somaliland Campaign. Landing on the Somali coast, they served alongside a naval detachment that stormed and captured the forts at Illig.

The 2nd Battalion was deployed to South Africa as reinforcement for the British Army during the Second Boer War in January 1900, and took part in an action at Karee Siding on 29 March 1900, when one officer and 11 troops died. The battalion served in South Africa throughout the war, which ended in June 1902 with the Peace of Vereeniging. They returned home three months later, arriving in late September 1902, and a few days after their return was entertained to a large celebratory banquet by the Mayor of Portsmouth.

A third militia battalion was formed from the former Hampshire Militia, with headquarters in Winchester. The battalion was embodied in January 1900 for service in South Africa, and disembodied in December the same year. A Volunteer battalion was also formed to serve in South Africa. Men from this battalion were involved in the worst train accident during the war, near Barberton, on 30 March 1902. Following the accident, the battalion returned to the United Kingdom, arriving at Southampton in May 1902.

In 1908, the Volunteers and Militia were reorganised nationally, with the former becoming the Territorial Force and the latter the Special Reserve; the regiment now had one Reserve battalion and five Territorial battalions.

First World War

During the First World War, the regiment expanded to 34 battalions. By the end of the First World War, the Hampshire Regiment had lost 7,580 officers and men killed in action.

Regular Army

The 1st Battalion was a Regular Army unit stationed in Colchester on the outbreak of war in August 1914. The battalion was assigned to the 11th Brigade, 4th Division. With the division, the battalion joined the British Expeditionary Force and was sent overseas to France in August 1914, landing at Le Havre on 23 August. The 1st Battalion saw its first combat against the German Army at Le Cateau. The battalion served on the Western Front for the rest of the war, participating in many battles in 1914 alone such as the First Battle of the Marne, the First Battle of the Aisne, and the Battle of Messines. In 1914, on Christmas Day, men of the 1st Battalion participated in the legendary Christmas Truce of 1914 where British and German soldiers fraternised in No man’s land. In 1915, the battalion took part in the Second Battle of Ypres, famous for its use of poison gas. In 1916 it fought at Albert and Le Transloy, which was part of the larger Somme offensive.

The 2nd Battalion was also a Regular Army battalion that was serving in India at the outbreak of war and arrived in England on 22 December 1914. In early 1915, the battalion became part of the 88th Brigade, assigned to the 29th Division. The 2nd Battalion took part in the Battle of Gallipoli when engaged in the fatal Landing at Cape Helles in April 1915 and fought in the Battle of Krithia. In 1916, the 2nd Battalion was evacuated to Alexandria due to a mixture of heavy casualties from combat, disease and the terrible weather conditions. In March 1916, the battalion was sent to France and would serve on the Western Front for the rest of the war, participating in the battle of Albert and Le Transloy rides, alongside the 1st Battalion.

Territorial Force

The 1/4th Battalion landed at Karachi in India in November 1914 as part of the 4th (Rawalpindi) Brigade in the 2nd (Rawalpindi) Division before moving to Basra in March 1915: it remained in Mesopotamia and Persia for the rest of the war. The 1/5th Battalion landed at Karachi in India in November 1914: it remained in India for the rest of the war. The 1/6th (Duke of Connaught’s Own) Battalion landed at Karachi in India in November 1914: it remained in India for the rest of the war. The 1/7th Battalion landed at Karachi in India in November 1914: it remained in India until January 1918 when it moved to Aden. The 1/8th (Isle of Wight Rifles, Princess Beatrice’s) Battalion landed at Suvla Bay in Gallipoli as part of the 163rd Brigade in the 54th (East Anglian) Division on 9 August 1915 and, having been evacuated from Gallipoli in December 1915, moved to Egypt and then to Palestine. The 1/9th (Cyclist) Battalion sailed for India in February 1916 and then to Vladivostok in October 1918. The 2/4th Battalion sailed for India in December 1914 as part of 2/1st Hampshire Brigade in the 2nd Wessex Division and then sailed for Egypt in April 1917 and to France in May 1918. The 2/5th Battalion sailed for India in December 1914 as part of 2/1st Hampshire Brigade in the 2nd Wessex Division and then sailed for Egypt in April 1917 before being disbanded in Palestine in August 1918. The 2/7th Battalion sailed for India in December 1914 as part of 2/1st Hampshire Brigade in the 2nd Wessex Division and then moved to Mesopotamia in September 1917.

New Armies

The 10th (Service) Battalion landed at Gallipoli in August 1915 and was then transferred to Salonika in October 1915. The 11th (Service) Battalion (Pioneers) landed at Le Havre in December 1915. The 12th (Service) Battalion landed in France in September 1915, but moved to Salonika in November 1915. The 14th (Service) Battalion (1st Portsmouth) landed at Le Havre in March 1916. The 15th (Service) Battalion (2nd Portsmouth) landed in France in May 1916.

Irish War of Independence

The 2nd Battalion was sent to Ireland to fight the Irish Republican Army during the Irish War of Independence. On 20 February 1921, soldiers from the Battalion took part in the Clonmult ambush during which the IRA suffered its greatest loss of volunteers in conflict.[18] Regimental historian Scott Daniell commented on the action that “like all the Irish operations, it was hateful to the British troops”. On 31 May 1921, seven soldiers, all with the band of the 2nd Battalion, Hampshire Regiment were on their way to the rifle range at Youghal County Cork when a road mine exploded under the truck they were travelling in. Three soldiers were killed outright, while a further four died later from their wounds.

Second World War

In the Second World War, the Hampshire Regiment had six battalions that fought abroad (the 1st, 2nd, 1/4th, 2/4th, 5th and 7th), whilst more battalions stayed at home. By the end of the Second World War, 2,094 officers and men of the Hampshire Regiment had lost their lives.

The 1st Battalion

The 1st Battalion, Hampshire Regiment was a Regular Army unit that was deployed on Garrison duties in El Daba, Egypt at the beginning of the war. It moved to Palestine on peace keeping duties in December 1939 and then moved to Moascar in Egypt, then to Mearsa Matruh in Summer 1940. One of its duties was to look after the large number of Italian prisoners after the fall of Sidi Barrani.

In February 1941, the 1st Battalion arrived in Malta, where it became part of the 1st (Malta) Infantry Brigade (with 1st Dorset Regiment and 2nd Devonshire Regiment). This later became the 231st Infantry Brigade. Duties in Malta included airfield repair and working as stevedores in the docks. Malta was subjected to a prolonged siege and, by July 1942, the food situation had become serious, but the situation eased as the Allies’ fortunes improved in the North African Campaign.

In April 1943, the 231st Brigade, including the 1st Hampshires, was moved to Alexandria, then subsequently to Cairo and Suez, where it trained as an independent assault brigade. Then, in July 1943, the 1st Battalion invaded Sicily as part of the first wave of Operation Husky, the Allied invasion of Sicily. The beach landing went smoothly, but the 1st Battalion ran into resistance at Vizzini on 13 July when it ran into the Herman Goring Parachute Panzer Division. On 22 July, the 1st Battalion was engaged in hard fighting for Agria, which only fell on 29 July. The 1st Battalion was reduced to three companies after the battle. There was further hard fighting to capture the Regalbuto Ridge, which ended the Sicilian Campaign. The 1st Battalion suffered 18 Officers and 286 Other Ranks killed or wounded in action in Sicily.

On 8 September 1943, the 231st Brigade landed in Italy, coming ashore at Potro San Venere near Pizzo. The 1st Battalion was involved in fighting as the Germans withdrew northwards. By October 1943, the 1st Battalion was back in Sicily waiting for transport back to the United Kingdom and, by November, the battalion was back in the United Kingdom for the first time in 22 years.

The battalion was allocated to the 50th (Northumbrian) Infantry Division, one of the assault divisions for the invasion of North West Europe, which had an excellent reputation after fighting in the Mediterranean theatre. On 6 June 1944, the 1st Battalion came ashore as part of Operation Overlord without any supporting tanks. Despite facing machine gun fire, the men captured Le Hamel and Arromanches after a hard fight. By the end of D-Day , the 1st Battalion had suffered 182 casualties, 64 of them being killed in action.

The Battalion started a three-week fight for the village of Hottot, against the German Panzer-Lehr-Division, in June 1944. This culminated in a major assault on 11 July. The 1st Battalion was withdrawn from the line the next day, testimony to the hard fighting. The Battalion was in the vanguard of the assault towards Villiers Bocage later in the month. There were stiff fights at St Germain d’Ectot and Launay. Villiers Bocage was taken on 4 August, following which the 50th Division was taken out of the line. In August 1944, a brigade attack was launched towards Conde, and the Battalion attacked St Pierre la Vielle. The fighting was particularly hard and, after the 11-hour battle, three of its Rifle companies were severely reduced – ‘B’ Company had 25 men, ‘C’ Company had 35 men, and ‘D’ Company was down to just 12 men; as ‘A’ Company was only lightly engaged, it was not so depleted. On 12 August, the 1st Battalion was withdrawn from the line. The Battalion was motorised and joined with the 11th Armoured Division for the breakout attack later in the month. There was no fighting and, on 31 August, the 1st Battalion crossed the river Seine at Vernon and swept on to Amiens.

The Battalion was then placed under command of the Guards Armoured Division and swept into Brussels on 3 September. The Battalion, still under command of the Guards Armoured, then started the attack towards Eindhoven, which was the attack designed to relieve the British and Polish airborne troops fighting at Arnhem, who had dropped as part of Operation Market Garden, which ended in a failure. The Battalion, as part of 231st Infantry Brigade, was charged with defending the “Corridor” formed by the armoured advance. In October, the 1st Battalion moved up to Nijmegen and moved onto “The Island”, the bridgehead over the river Waal but behind the river Lek.

In October 1944, the Battalion attacked north of Bemmel, and expanded the bridgehead up to the Wettering Canal. The Battalion then went onto the defensive until the end of November. The Battalion then moved back to Ypres in Belgium, and subsequently was moved back to the United Kingdom with the rest of the 50th Division, and the men were mainly used as replacements for other infantry battalions, with the exception of a small training cadre consisting of 12 officers and 100 other ranks. The battalion ended the war in Louth, Lincolnshire. Since D-Day, the 1st Battalion, Hampshire Regiment had suffered over 1,281 casualties, including 231 officers and men killed in action, the rest being either wounded or missing in action.

The 2nd Battalion

The 2nd Battalion was also a Regular Army battalion and started the war in Aldershot, Hampshire, England. In September 1939, the 2nd Battalion moved to Cherbourg, France with the 1st Guards Brigade, alongside the 3rd Battalion, Grenadier Guards and the 2nd Battalion, Coldstream Guards, attached to 1st Infantry Division. It then moved to Sille-le-Guillaume, and from there 250 miles north to take its allocated place on the “Gort Line”, which it reached on 3 October. Later that month, the Battalion moved to the Belgian/French border and, in February 1940, the Battalion spent three weeks on the Maginot Line before returning to Metz.

The Battalion crossed into Belgium in response to the German invasion of Belgium and, by 14 May, was digging into a defensive position. While an attack never came, with the retreat of the Dutch and the French Ninth Army, the 1st Division was ordered to retreat on 16 May. A slow retreat then commenced, ending at Dunkirk. The Battalion began to be embarked from Dunkirk for the United Kingdom (some were evacuated on 2 June). The battalion managed to carry away 100% of their small-arms, mortars and anti-tank rifles. It was congratulated by the Minister for War, Mr Anthony Eden. The battalion then spent two years on home defence, training and preparing for a German invasion that never arrived.

In November 1942, the Battalion, Hampshire Regiment sailed for North Africa, taking part in Operation Torch with the 1st Guards Brigade, which was now part of the 78th Infantry Division. They disembarked at Algiers on 21 November and joined the British First Army. Later that month, the Battalion moved to Tebourba. The following day the 2nd Battalion were attacked by heavy shelling and, on 1 December, the Battalion was attacked by a force four times its size, which was able to outflank it and rake it with enfilading fire. This was the start of three days of fierce close combat, fought at close quarters and featuring bayonet charges and counter-charges. The battalion was forced back a mile and a half and, on 3 December, Major Wallace Le Patourel was awarded the Victoria Cross for his gallantry in leading counter-attacks against the enemy. After three days, the Battalion retreated through Tebourba, only to find all other troops had been withdrawn and the road behind them was cut. The battalion broke into small groups and attempted to break through to allied lines, reuniting at Medjez-el-Bab; many, including the Commanding Officer, were captured. The Battalion, which had started the battle with 689 men, was down to 194 men. The battalion was withdrawn from the line and in December, nine officers and 260 other ranks joined the 2nd Battalion. After the fall of Tunis on 13 May 1943, the 2nd Battalion joined the 128th (Hampshire) Brigade attached to 46th (West Riding) Infantry Division.

The 128th Infantry Brigade

The Hampshire Regiment had a number of Territorial Army (TA) battalions, whose ranks were swelled throughout 1939 when the TA was ordered to be doubled in size. During 1939, due to the number of new recruits, the 5/7th Battalion was split into the 5th Battalion and the 7th Battalion, and the 4th Battalion was split into the 1/4th Battalion and the 2/4th Battalion. The 1/4th, 2/4th and 5th Battalions were all grouped into the 128th Infantry Brigade (the “Hampshire Brigade”) and the 7th Battalion was part of the 130th Infantry Brigade. Both brigades were part of the 43rd (Wessex) Infantry Division.

However, on 6 June 1942, the 128th Brigade was detached from the 43rd Division until 15 August, when it was transferred to the 46th Infantry Division, where it would remain for the rest of the war. In January 1943, the brigade left Britain with the rest of the 46th Infantry Division, for North Africa, as part of Operation Torch. The brigade disembarked at Algiers on 17 January, moving to Bone, where it remained until the end of January, when the brigade moved to Hunts Gap.

Further information: Operation Ochsenkopf

The 5th Battalion was sent 12 miles further ahead to Sidi Nsir. The 5th Battalion at Sidi N’sir was attacked in overwhelming strength in February 1943 as the Germans began Operation “Ox Head”, a Corps level assault by German Paratroopers, elements of 10th Panzer Division and the 501st Heavy Tank Battalion. The 5th Battalion was supported by 155th Battery, Royal Artillery. The Germans had to take the Hampshires’ hilltop positions before they could attack the artillery, knocking out all the guns, whose crews stood and died firing over open sights at the German tanks. Only nine gunners survived. At 5pm, ‘B’ Company of the 5th Battalion, reduced to 30 men, was overrun. At dusk, the battalion considered its position untenable, and it withdrew to a feature known as “Hampshire Farm”. Of the four Rifle Companies, only ‘C’ Company, less a single platoon, and 30 men of ‘D’ Company, remained. The German force was delayed for one critical day.

Later in the month, the Hampshire Brigade was attacked at Hunt’s Gap by the German force that had been delayed at Sidi N’sir. 2/4th was the main Battalion engaged, with 1/4th Battalion in support. The 2/5th Leicesters was attached to the brigade as well. The situation was so precarious that the 2nd Hampshires, still training its new recruits, was put into the line alongside 1/4th Battalion. The brigade was supported by plenty of artillery and the Churchill tanks of the North Irish Horse. Extensive minefields and heavy dive bombing kept the German tanks at bay. On 28 February, a pre-dawn attack penetrated the 2/4th battalion’s ‘B’ Company positions, but heroic resistance and the tanks of the North Irish Horse kept the Germans at bay until dusk, when ‘B’ Company was overrun. ‘C’ Company was overrun by German infantry. On 1 March, the Germans attacked again, and ‘D’ Company was overrun, but 2/4th Battalion hung on to their remaining positions. On 2 March, the Germans withdrew, and on 5 March the 2/4th Battalion was relieved by the 8th Battalion, Argyll and Sutherland Highlanders of 36th Brigade of the 78th Battleaxe Division. The 2/4th Battalion had suffered 243 men killed or missing.

During March, the brigade was engaged on defensive patrolling, under heavy shelling. 1/4th Battalion lost 100 casualties during March, but 5th Battalion received 5 Officers and 150 men as replacements. On 5 April, the brigade handed over its positions and moved 100 miles south to El Ala. The 128th Brigade subsequently captured the Fondouk Gap, allowing the 6th Armoured Division to pass through and debouche onto the Kairouan Plain. In April 1943, the 128th Infantry Brigade attacked Bou Arada. The 16th Battalion, Durham Light Infantry was added to the brigade for the attack. Five Field regiments and two Medium regiments of the Royal Artillery supported the 128th Brigade. Early progress was good, but when the mist cleared all four battalions were caught in the open under heavy fire, and losses mounted. The rifle companies of 1/4th Battalion only had 3 Officers and 80 men left between them and the 2/4th Battalion had to reorganise onto a three-company basis.

Tunis fell and the North African Campaign was over in May 1943. The 128th Infantry Brigade was reconstituted to consist of 2nd Battalion, 1/4th Battalion and 5th Battalion. The 2/4th Battalion was split into two to form two Defence Units of two Beach Groups. Their role was to protect the maintenance area of a Beach Group when it made a landing where no port was available.

The 128th Infantry Brigade was one of three British brigades that made an assault landing at Salerno in Italy as part of British X Corps under command of US Fifth Army, led by Mark Clark in September 1943. The landing was opposed by shore batteries firing shrapnel, and the beaches were raked by machine gun fire. 2nd Battalion and 1/4th Battalion made steady progress, but 5th Battalion had been landed in the wrong place and suffered heavily. A German counter-attack overran ‘B’ Company and the Battalion HQ of 5th Battalion. The 5th Battalion lost 40 men killed and over 300 were wounded or taken prisoner.

On 12 September, the Germans started a general assault against the Salerno bridgehead, which made good progress; the US VI Corps were almost driven into the sea. However, the arrival of US paratroops and the British 7th Armoured Division turned the tide. The 128th Brigade was in the hills above Salerno, and the fighting was hard, but on 20 September the Germans began to withdraw northwards, and the pressure eased. All three battalions had suffered – 2nd Battalion suffered 304 casualties, 1/4th Battalion suffered 159 casualties and the 5th Battalion suffered 29 officer and over 400 other rank casualties.

The 128th Brigade, still part of the X Corps, moved up to the River Volturno, behind which the Germans had withdrawn. On 10 October, the 1/4th Battalion captured the town of Castel Volturno, alongside the river, and on 12 October the 1/4th made a night assault across the river, establishing a small bridgehead. The 2nd and 5th battalions moved across the river in support, but the entire 128th Brigade was soon engaged in a stiff fire-fight. The brigade advanced some 2,500 yards, and then dug in behind a canal as the Germans bought up tanks. The brigade remained in the low-lying, swampy, mosquito-ridden land between the river and the canal until the Germans withdrew due to a breakthrough elsewhere. The brigade then advanced along Route 7, meeting little resistance. The 128th Brigade was then taken out of the line for R&R.

In November 1943, the Hampshire Brigade moved up to the River Garigliano. It was relieved on 11 January, and moved back to the River Volturno. They were selected as the Assault Brigade of the 46th Infantry Division, and trained in river crossings. Then, in January 1944, the Hampshire Brigade made a night assault across the swift flowing River Garigliano. The brigade had severe problems getting the boats through the minefields down to the river, and in the darkness confusion reigned. Only a few men managed to get across, and these were withdrawn at daylight. The Hampshire Brigade then assaulted Monte Damiano, a bare, razor-backed feature, already strewn with British dead from 56th (London) Infantry Division. The assault was made by the 1/4th and 2nd battalions in daylight, and immediately came under heavy mortar and machine-gun fire. The attack was made with great dash, but it failed, with heavy casualties.

The 5th Battalion was put under the command of the 138th Infantry Brigade, part of the 46th Division, to assault Mounts Ornito and Cerasola in February 1944. The assault met little opposition, although the Germans put in spirited counter-attacks on Mount Ornito, which were all driven off. However, as the days passed, the casualties mounted from heavy shelling; the bare rock made cover difficult. In eight days, the 5th Battalion suffered 200 casualties. Supply was particularly difficult, as supplies had to be carried up by mules and porters for 3 to 4 hours from the nearest road. On 7 February, the 5th Battalion attacked Mount Cerasola, a successful assault. On 10 February, the 5th Battalion was relieved.

The Hampshire Brigade was relieved later in the month. It moved south to Naples and, on 16 March, sailed for Egypt, and subsequently moved to Palestine, Lebanon, Syria, and back to Egypt. All battalions were brought up to strength, largely from gunners from disbanded Middle-East Anti-Aircraft units who were retrained as infantrymen. On 27 June, the 128th Brigade sailed from Alexandria, and subsequently landed in Taranto. The move north through Italy was at an easy pace.

In August 1944, the 128th Brigade started its assault on the “Gothic Line”, a line of German defences across the Etruscan Apennines. The Hampshire brigade, with the North Irish Horse under command, led the 46th Division’s assault (along with the 46th Reconnaissance Regiment). The brigade’s first target was to cross the River Metauro and take Monte Bartolo. The assault went to plan against little opposition, and Mount Bartolo was captured by the morning of 29 August. The brigade had marched 25 miles to cover 12 miles as the crow flies, and climbed 1,500 feet. Only the 1/4th Battalion had come across serious opposition, engaging in heavy fighting around Montegaudio. Later in the month the brigade assaulted the Gothic Line proper, crossing the River Foglia and assaulting Monte Gridolfo. This was heavily defended, with all cover cleared from its bare slopes. Nevertheless, the men of the 2nd Battalion assaulted them with great vigour, and by dawn on 31 August they had captured the first crest. The 1/4th Battalion passed through, driving deeper into Gothic Line. During this assault, Lieutenant Gerard Norton was awarded the Victoria Cross. On 1 September, the 5th Battalion took the lead, and by 2 September had captured Meleto. The Gothic Line had been breached. A fighting advance continued northwards. On 5 September the 128th Brigade was relieved, and sent to the rear for rest, but they were back in the line by 11 September.

The 128th Brigade began an assault on Montescudo in September 1944. Montescudo was defended by the German 100th Mountain Regiment, and they put up a desperate resistance. Other elements of the Brigade assaulted Trarivi, which was captured by 16 September. On 18 September, the brigade was relieved. All three battalions were short of men, even after replacements were received from the 1st Battalion, Buffs (Royal East Kent Regiment). The Hampshire Brigade crossed the River Fiumicino, and then the Rubicon. The weather was atrocious, and movement was slowed by deep mud, and supply was difficult. Fighting continued until 9 October. A steady advance was made, and by 12 November the River Montone was crossed; on 26 November the River Lamone was reached. This was crossed on 3 December in the face of stiff opposition, and by 6 December the Brigade had captured Casa Nova. The Brigade was relieved the following day, and moved well to the rear. From 24 August (when the 128th Brigade moved up to the Gothic Line) to 7 December, when they were relieved, the 128th (Hampshire) Brigade had suffered 1,276 casualties.

In January 1945 the 2nd Battalion and the 5th Battalion embarked from Taranto and disembarked in Piraeus, Greece, two days later. 1/4th Battalion arrived on 22 January. The 128th (Hampshire) Brigade (now known as “Tigerforce”) split its battalions, and set about disarming the E.L.A.S Army. The troops were welcomed everywhere, and there was no fighting. Then, in April 1945, the brigade began to return to Italy for the final offensive. By 1 May, the brigade was back in the line around Forlimpopoli; but the war ended before the brigade was in action again.

The 2/4th Battalion

The 20th Beach Group (“A” and “B” companies) invaded Sicily as part of Operation Husky in July 1943. The role of the Beach Group was to land supplies until a harbour could be captured. On 12 July, 20 Beach Group moved inland, behind the advancing infantry, but by 22 July the half-battalion was in the line, capturing Mount Scalpello. On 4 August, the half-battalion moved to Catania, where it remained on garrison duty.

In September 1943, the 21st Beach Group (“C” and “D” companies) invaded Salerno. The assault went in at dawn against stiff opposition and, rather than take its allotted role, the half-battalion was moved straight into the line. However, there was little action until 13 September, when the half-battalion was attacked by armoured half-tracks. This happened again on 15 September when ‘D’ Company was overrun. However, the half-tracks didn’t assault ‘D’ Company as such, they ran over the slit trenches until picked off by 6pdr anti-tank guns. On 17 September, the half-battalion was moved back into reserve and, by 23 September, it was back on the beaches unloading cargo.

In November 1943, the two halves of the 2/4th Battalion were re-united at Pontecagnano near Salerno. However, there was no immediate employment, and orders were received to send cadres to the three battalions in the 128th (Hampshire) Brigade (this was rescinded after protests). However, six officers and 77 other ranks were posted away to form the “2/4th Hampshire Training Centre”, three officers and 188 other ranks were assigned to ‘porterage duties’ and a detachment of 50 men was assigned to help the Provost Corps with traffic duties.

The Battalion was back in the line in Italy, near Garigliano, as part of 28th Infantry Brigade, in 4th Infantry Division in February 1944. This was the same ground where the Hampshire Brigade had suffered through the Italian winter. The battalion was relieved for short periods on a regular basis before returning to the line. In May 1944, the Battalion assisted the Brigade’s two other battalions (2nd King’s and 2nd Somersets) in crossing the River Rapido as part of the assault on Monte Cassino. The river and bank were under intense enemy fire, and the river so swift that swimmers from 2/4th had to cross with lines to enable the boats to get across. Troops got across the river, but could make little headway against the storm of machine gun fire. The 2/4th could not get across to join their fellow battalions, and so, on 12 May, it came under command of 12th Infantry Brigade and crossed via a bridge on 13 May. Supported by the 17th/21st Lancers’s Sherman tanks, the 2/4th Battalion attacked along the river, taking 200 prisoners. On 14 May, back in ther 28th Brigade, the 2/4th attempted to cross the River Pioppeta. The tank bridge sank in the mud, and the battalion took 100 casualties in two minutes. The 2/4th waded the river and, in spite of heavy casualties and fierce resistance, the advance continued. During this advance, Captain Richard Wakeford was awarded the Victoria Cross. By 6.30pm, all objectives had been captured, and the 2/4th reorganised on a three-company basis. On 16 May, the battalion was relieved. Two days later, Cassino was captured by the Polish II Corps.

In June 1944, the Battalion was back in the line near the village of Villastrada, between Lake Chiusi and Lake Trasimeno to north of Rome. On 24 June, a major attack was launched on that section of the Trasimene Line by 2nd Battalion, Somerset Light Infantry supported by the tanks of the 12th Canadian Armoured Regiment. 2/4th Hampshires was to follow on, but its entry into battle was delayed until the next day. Having passed through the village of Vaiano, which was unoccupied, an attack was launched on a ridge being held by the German 1st Parachute Division. Although “C” Company established a foothold on the ridge, occupying a farmhouse, that night a fierce German counter-attack was made by the Germans, who overran the company headquarters. Fighting was close and confused, and the company ran low on ammunition. It was forced back to literally the last ditch, but hung on. At dawn the next day, 26 June, the battalion counter-attacked and managed to recapture its previous positions; the Germans were withdrawing to the Arezzo Line. The 2/4th Battalion followed up, coming into action again on 21 July. Supported by the North Irish Horse, a steady advance was made. The 2/4th Battalion was then taken out of the line again – some platoons were down to ten men each with no officer.

The Battalion then attacked Santa Lucia, which was captured on 30 July 1944 after a small but fierce battle. The enemy then withdrew, and the Battalion moved up to the River Arno. On 10 August, the battalion was withdrawn. In September 1944, the Battalion began its assault on the Gothic Line, attacking across the River Marano and capturing Casa Bagli. All the first day objectives were achieved, and the 2/4th defended them on 16 September against German counter-attacks. On 17 September, the battalion captured Cerasola; it was relieved the following day. The battalion then moved north behind the British Eighth Army’s advance, arriving in time to stand by to support the Hampshire Brigade’s assault on Forli during November. During 22 November, the 2/4th attacked and captured a bridgehead over the River Cosina against heavy shelling; this was the battalion’s last action in Italy.

In December 1944, the Battalion was flown to Greece in the bomb-bays of Wellington and Liberator bombers in response to the outbreak of the Greek Civil War, arriving on 12 December. The E.L.A.S. Army, armed and trained by the British, was trying to overthrow the Greek Government. On arrival, the 2/4th Battalion was split up, primarily defending the airfield, then clearing E.L.A.S. forces from Athens. This did involve some fighting, and the 2/4th Battalion lost three men killed. The 2/4th Battalion then settled down to peace-keeping duties. In May 1945, the Battalion was moved to Crete to take charge of the Germans, who had surrendered, and they ended the war there.

The 7th Battalion

The 7th Battalion was a Territorial Army unit, originally the 5/7th Battalion until it was split into the 5th and 7th battalions when the Territorial Army was doubled in size in the spring and summer of 1939. The 7th Battalion remained in the United Kingdom training long and hard for many years until after the D-Day landings of 6 June 1944.

The Battalion was sent to Normandy as reinforcements with the 130th Infantry Brigade attached to the 43rd (Wessex) Infantry Division. In June 1944, the Battalion landed near Le Hamel. They were with 130th Brigade (with 4th and 5th Dorsets) and were initially held in reserve. The Battalion attacked Maltot, supported by tanks of 9th Royal Tank Regiment (9th RTR) in July 1944. The village was defended by Waffen-SS troops supported by Tiger tanks. Both the 7th Battalion and 9th RTR suffered severe casualties, and although the 7th Battalion managed to fight its way into the village it was withdrawn. The 7th Battalion suffered 18 officer and 208 other rank casualties, including 4 officers and 12 other ranks killed, but was back in the line two days later.

The Battalion attacked the village of Cahagnes later in the month. This was fought in typical ‘bocage’ countryside, but after the initial attack by the brigade ran into difficulties, 7th Battalion deployed from reserves and captured Cahagnes, beating off several German counter-attacks. On 2 August, the battalion moved up to Jurques, and after a short stiff fight advanced to “Point 132”, close to Mount Pincon. On 6 August, the battalion put in a deceptive attack on Mount Pincon, making a diversion whilst 129th Infantry Brigade made a flank attack. During heavy fighting, ‘C’ Company incurred many casualties, including all the officers. Following the successful flank attack by the 129th Brigade, the 7th Battalion mopped up and concentrated near Mauny by 10 August.

In August 1944, the Battalion captured St Denis de Mere after a bombardment by nine artillery regiments. The Battalion took 74 prisoners and then prepared for “The Breakout”. The Battalion then moved 50 miles north-east to Conches and, by 27 August, the 7th Battalion was across the River Seine. The battalion then participated in the capture of Tilly, and thereafter spent 11 days taking in replacements and resting. In September 1944, the Battalion started to move to Brussels for temporary garrison duty, arriving the next day. This easy duty was welcome; since landing in Normandy in June, the 7th Hampshires had lost (including wounded) 35 officers and 450 other ranks.

The Battalion fought in Operation Market Garden in September 1944. On 20 September, the battalion moved through Eindhoven to Grave. The battalion was tasked with defending the southern end of the two large bridges over the Waal. On 23 September, the 7th was sent into the line, fighting west of the bridges in the Valburg-Elst area. It then moved to the “Island” and stayed there until 4 October, before moving to the Groesbeek-Mook area on the Dutch-German border.

In November 1944, the Battalion was moved to Maastricht, and then moved around as divisional reserve. On 19 December, the German launched their Ardennes offensive, which caused the 7th Battalion to move north of Liege to guard the bridges over the Meuse. On 26 December, the 7th Battalion moved to Aachen, and on 12 January moved again to Teveren. Then, in January 1945, the Battalion captured Putt, then Waldenrath, and on 25 January captured Dremmen and Porselen. The Battalion advanced south-east from Cleves as part of the big Reichwald offensive. Over two days fighting for Berkhofel, the 7th lost 70 casualties. It was relieved on 17 February.

The Battalion crossed the Rhine in assault craft, consolidating on the far bank and then advancing across the IJssel Canal to Milligen, which was captured on 26 March. German resistance was collapsing, and the 7th moved over the Twente Canal on 1 April, liberating Hengelo. In April 1945, the 7th Battalion took part in operation “Forward On”, sweeping through Germany against minimal resistance. However, on 13 April, the Battalion had a hard fight for Cloppenburg, a fight that was as hard as any they had fought, vicious hand-to-hand fighting from street to street. Luckily, they were supported by tanks, sappers of the Royal Engineers and a single Armoured Vehicle Royal Engineers, which demolished several buildings with its petard. Cloppenburg was captured the next day. Then, in April, the Battalion embarked on its final advance, moving through Bahlum, Bremen, then Bremerhavan, capturing hundreds then thousands of prisoners. The 7th Battalion reached Gnarrenburg on 3 May, and were still there when the Germans surrendered the following day.

The Home Based Battalions

Although the Hampshire Regiment sent six battalions overseas, many more stayed at home as training units or were converted to other roles. Before the war, the 6th Battalion (Duke of Connaught’s Own), Hampshire Regiment was converted into the 59th Anti-Tank Regiment, Royal Artillery, and upon the Territorial Army being doubled in size in 1939, formed a 2nd Line duplicate. The 59th Anti-Tank Regiment served with the 43rd (Wessex) Infantry Division and went with them to Normandy.

The original 8th Battalion (Isle of Wight Rifles), Hampshire Regiment was transferred to the Royal Artillery and made into an artillery battery in 1937. However, a new 8th Battalion was formed, shortly after the war began, at Southampton in December 1939. It subsequently split into the 1/8th and 2/8th Battalions, before the 2/8th Battalion was renamed the 13th Battalion, and then both battalions were re-formed into the 8th Battalion again, which was subsequently renumbered the 30th Battalion and was disbanded in September 1942.

The 9th Battalion was formed on the Isle of Wight in July 1940 and was later assigned to the 201st Independent Infantry Brigade (Home). In 1942, the battalion was converted to armour as the 157th Regiment Royal Armoured Corps and assigned to 36th Army Tank Brigade. Units converted in this way continued to wear their infantry cap badge on the black beret of the Royal Armoured Corps. However, the brigade was disbanded in July 1943 and 157 RAC was broken up in August, without having seen active service.

The 10th Battalion was formed in Aldershot in July 1940; it was assigned to the 201st Independent Infantry Brigade (Home), alongside the 9th Battalion. In 1941, the 10th Hampshire was also transferred to the Royal Armoured Corps, becoming the 147th Regiment Royal Armoured Corps, and was assigned to the 34th Army Tank Brigade. Its Churchill tanks were named after Hampshire Regiment battles (the CO’s tank was called “Minden”). The regiment went to serve with distinction with 34th Tank Brigade in the North West Europe Campaign at Normandy, Le Havre, the Reichswald Forest and Operation Plunder from 1944 to 1945.

The 50th (Holding) Battalion, which was formed on the Isle of Wight in June 1940, absorbed the Royal Militia of the Island of Jersey. The Jersey Militia subsequently became the 11th Battalion, whilst the rest of the 50th Battalion became the 12th Battalion. The 11th Battalion stayed in the United Kingdom as a training battalion until the war ended, first with the 209th Brigade and later with the 135th Brigade, 45th (Holding) Division. The 12th Battalion also stayed in the United Kingdom, with the 136th Brigade, but was disbanded in September 1944 after sending a large final draft to the 7th Battalion serving in North-west Europe.

In September 1940, the 70th (Young Soldiers) Battalion was formed in Southampton, but soon moved to Basingstoke. It was raised for those soldiers around the age of 18 or 19 who had volunteered for the Army but were not old enough to be conscripted, the age being 20 at the time. However, the battalion was disbanded in July 1943 as the British government lowered the age of conscription for the British Armed Forces from 20 to 18.

The Hampshire Regiment’s Depot had been in Winchester since long before the Second World War. However, in September 1939, it moved to Parkhurst, Isle of Wight, where it stayed for the rest of the war.

Post war and amalgamation

In 1946, the regiment was awarded the title of Royal Hampshire Regiment in recognition of its service during the Second World War. The regiment was in Northern Ireland (Operation Banner) in 1972 and undertook a further eight tours over the next two decades. In 1992, as part of the Options for Change reorganisations, the regiment was merged with the Queen’s Regiment to become the Princess of Wales’s Royal Regiment.

Regimental museum

The Royal Hampshire Regiment Museum is based at Lower Barracks in Winchester. It is one of several regimental museums that comprise Winchester’s Military Museums.

The Regiment was awarded the following battle honours:

From the 37th (North Hampshire) Regiment of Foot: Minden, Tournay, Peninsula

From the 67th (South Hampshire) Regiment of Foot: Barrosa, Peninsula, India, Taku Forts, Pekin 1860, Charasiah, Kabul 1879,

Afghanistan 1878-80

Blenheim1, Ramillies1, Oudenarde1, Malplaquet1, Dettingen1, Belleisle2, Burma 1885-87, Paardeberg, South Africa 1900-02
The Great War (32 battalions): Le Cateau, Retreat from Mons, Marne 1914 ’18, Aisne 1914, Armentières 1914, Ypres 1915 ’17 ’18, St. Julien, Frezenberg, Bellewaarde, Somme 1916 ’18, Albert 1916, Guillemont, Ginchy, Flers-Courcelette, Thiepval, Le Transloy, Ancre Heights, Ancre 1916, Arras 1917 ’18, Vimy 1917, Scarpe 1917 ’18, Messines 1917, Pilckem, Langemarck 1917, Menin Road, Polygon Wood, Broodseinde, Poelcappelle, Passchendaele, Cambrai 1917 ’18, St. Quentin, Bapaume 1918, Rosières, Lys, Estaires, Hazebrouck, Bailleul, Kemmel, Béthune, Tardenois, Drocourt-Quéant, Hindenburg Line, Havrincourt, Canal du Nord, Courtrai, Selle, Valenciennes, Sambre, France and Flanders 1914-18, Italy 1917-18, Kosturino, Struma, Doiran 1917 ’18, Macedonia 1915-18, Helles, Landing at Helles, Krithia, Suvla, Sari Bair, Landing at Suvla, Scimitar Hill, Gallipoli 1915-16, Egypt 1915-17, Gaza, El Mughar, Nebi Samwil, Jerusalem, Jaffa, Tell ‘Asur, Megiddo, Sharon, Palestine 1917-18, Aden, Shaiba, Kut al Amara 1915 ’17, Tigris 1916, Baghdad, Sharqat, Mesopotamia 1915-18, Persia 1918-19, Archangel 1919, Siberia 1918-19

The Second World War: Dunkirk 1940, Normandy Landing, Tilly sur Seulles, Caen, Hill 112, Mont Pincon, Jurques, St. Pierre La Vielle, Nederrijn, Roer, Rhineland, Goch, Rhine, North-West Europe 1940 ’44-45, Tebourba Gap, Sidi Nsir, Hunt’s Gap, Montagne Farm, Fondouk, Pichon, El Kourzia, Ber Rabal, North Africa 1940-43, Landing in Sicily, Regalbuto, Sicily 1943, Landing at Porto S. Venere, Salerno, Salerno Hills, Battipaglia, Cava di Tirreni, Volturno Crossing, Garigliano Crossing, Damiano, Monte Ornito, Cerasola, Cassino II, Massa Vertecchi, Trasimene Line, Advance to Florence, Gothic Line, Monte Gridolfo, Montegaudio, Coriano, Montilgallo, Capture of Forli, Cosina Canal Crossing, Lamone Crossing, Pideura, Rimini Line, Montescudo, Frisoni, Italy 1943-45, Athens, Greece 1944-45, Malta 1941-42

Recipients of the Victoria Cross

2nd Lieutenant George Raymond Dallas Moor, 2nd Battalion, Hampshire Regiment, Great War

2nd Lieutenant Dennis George Wyldbore Hewitt, 14th (Service) Battalion, Hampshire Regiment, Great War

2nd Lieutenant Montague Shadworth Seymour Moore, 15th (Service) Battalion, Hampshire Regiment, Great War

Major Wallace Le Patourel, 2nd Battalion, Hampshire Regiment, Second World War

Captain Richard Wakeford, 2/4th Battalion, Hampshire Regiment, Second World War

Lieutenant Gerard Ross Norton, 1/4th Battalion, Hampshire Regiment, Second World War

Regimental Colonels were:

The Hampshire Regiment – (1881)

1881–1888 (1st Bn): Gen. Sir Edmund Haythorne, KCB

1881–1883 (2nd Bn): Lt-Gen. William Mark Wood

1888–1893: Gen. Thomas Edmond Knox, CB

1893–1908: Lt-Gen. Sir John Wellesley Thomas, KCB

1908–1924: Maj-Gen. Sir Charles Benjamin Knowles, KCB

1924–1945: Gen. Sir Richard Cyril Byrne Haking, GBE, KCB, KCMG

1945–1948: Gen. Sir George Darell Jeffreys, 1st Baron Jeffreys, KCB, KCVO, CMG, JP

The Royal Hampshire Regiment – (1946)

1948–1954: Brig. Philip Herbert Cadoux-Hudson, MC, DL

1954–1964: Brig. Gerald Dominick Browne, CBE, DL

1964–1971: Maj-Gen. Richard Hutchinson Batten, CB, CBE, DSO, DL

1971–1981: Brig. David John Warren, DSO, OBE, MC, DL

1981–1987: Gen. Sir David Fraser, GCB, OBE, DL

1987–1992: Brig. Robert Long, CBE, MC, DL

Lower Barracks

Lower Barracks was a military installation in Winchester. It was the depot of the Royal Hampshire Regiment from its formation in 1881 until it moved out in 1959. The Royal Hampshire Regiment Museum reopened at Serle’s House in 2004. It is one of several independent museums that comprise Winchester’s Military Museums.

The buildings at the Lower Barracks at Winchester date back to 1730 when Serle’s House, which had been designed by Thomas Archer, was built for William Seldon. The house was acquired by James Serle, a lawyer, in 1781 and then sold to the War Office in 1796. Most of the other buildings in the Lower Barracks, including a barrack block and a small parade ground, were built during the Crimean War. In 1873 a system of recruiting areas based on counties was instituted under the Cardwell Reforms and the barracks became the depot for the 37th (North Hampshire) Regiment of Foot and the 67th (South Hampshire) Regiment of Foot. Following the Childers Reforms, the 37th and 67th regiments amalgamated to form the Royal Hampshire Regiment with its depot in the barracks in 1881.

The Lower Barracks were demoted to the status of out-station to the Wessex Brigade depot at Topsham Barracks in Exeter in 1959. Serle’s House was retained by the Ministry of Defence but many of the other buildings were converted for private residential use in the late 1990s.

In the 1680s Christopher Wren proposed the site between Winchester Castle and Southgate Street for a Palace at Winchester; intended, initially for Charles II, who was famously fond of the city.

Plans for this project, however, never came to fruition and it was eventually abandoned shortly after Wren’s death in 1723.

The site, which was unusually large for a private house so close to the centre of the city, was purchased by William Sheldon, whose father had been an equerry to King James II, and the great house was built in about 1730.

The entrance to what is now The Royal Hampshire Regiment Museum, which faces onto the Memorial Garden, was actually originally the rear entrance of the house. The main, or front, entrance once faced onto Bowling Green Lane, which was long ago eradicated to make way for the Barracks.

In 1781 the house was sold to an attorney, James Serle, whose son, Peter Serle, forged a link between the house and the military that was to last in excess of 200 years.

Peter Serle, whose service spanned the Napoleonic Wars, began soldiering as a hobby. He joined a Corps of Hampshire Volunteers and later rose to command them. He was so successful that in 1804 he was transferred from the Volunteers direct to the command of the South Hampshire Militia. Eventually reaching the rank of full Colonel, Peter Serle retained his command until his death in 1826.

Serle’s House was always used as the Headquarters of whatever command Peter was holding, even whilst the family were still in occupation of their home. In 1796 he sold the property to the Government for £3,750.

The house has seen use as Militia Headquarters, married quarters for officers of the garrison, residence of the Barrack Master, the Officers’ Mess and, in about 1859, it was used as the Judges’ Lodgings for the Assizes. By 1881, however, when the Militia had become the 3rd Battalion The Hampshire Regiment, Serle’s House was established as its Headquarters, as well as that of the 37th Regimental District. Later it would become the Headquarters of the Depot, The Hampshire Regiment. When the Depot closed in 1958 Serle’s House became Regimental Headquarters, encompassing the Regimental Museum and Memorial Garden.

In 2001 the Ministry of Defence sold the entire Peninsula Barracks site complex, resulting in a risk that Serle’s House was going to become commercial premises and the Royal Hampshire Regiment potentially having to move out. Following discussions with Councillor Ken Thornber, then Leader of Hampshire County Council (HCC), the building was purchased directly from the MOD for County Council use and the Royal Hampshire Regiment was kindly given a lease for the ground floor and the Memorial Garden.

Sourced from Wikipedia

Poems by Derrick W Sole

 Articles  Comments Off on Poems by Derrick W Sole
Jun 282020
 

Poems By Derrick W Sole

The Best Of The Best.

Still not sixteen, but I was on my way, how long this train would take, no one did say, I have no memory of being on a train before, yes, I had seen many, but to get on one, I had never opened the door.

A new life was about to begin, the old one had not been that good, but the new look promising, I was about to have a family, something in my life, that had been lacking, siblings I had, but for a decade, together we had not been living.

Back then, we were not hampered, by the fascist left, the liberal morons, who of brain matter and common sense, are so bereft, we were considered mature enough, to choose our life, even if tough.

So off to London, then way out west, to join a regiment, the elite of the elite, just plainly the best, I’m not good at doing as I’m told, but the Royal Green Jackets, allowed free thinking men, into their fold.

I walked through the gates and I felt at home, this is where I belonged, Winchester, a place, to me not known, but Lincoln green was in my blood, and Rifle Green, was full of history, and brotherhood.

First call, the barber’s shop, rear of the Naafi block, top of the stairs, stands a queue, old sweats, and boys like me, all of them new, no short back and sides, all off, including the top.

You had to be fit, just to march at regimental pace, faster than the rest put together, but it was never a race, basic training, tough for all, but your brothers needed to know, you would be there, should they call.

So much to take in, the first day is a blur, slept like a log, shouting and banging, in the morning, you forgot where you were, not for long, there was no time for that, up and at em, first bed pack.

At least this was not Bushfield camp, spider huts, cold and damp, not fit for man nor beast, but strangely felt like home, even if on the eye, it didn’t please, how many beds, in a hut did they squeeze.

Boys became men, a team of brothers, never to be alone again, shoulder to shoulder, forever to stand, your life for theirs, as brother a band, should you be called upon, failure, never an option.

Basic training, together we worked, to be the best there was, nothing did we shirk, passing out was not the end, rifleman yes, off to our battalion, now begins the real hard work.

There is so much that made us who we are, friends lost in places near home, and places far, we are still brothers, we are RGJ, no one can ever take that away, our blood is green, swift and bold, in our soul, for ever it will stay.

Derrick W Sole, 2020, Copyright Protected

Swift and Bold (Celer et Audax)

No musket for such a man, bold and brave, swift as only a Rifleman can, deadly is his aim, his Rifle, his psyche, his game, a chosen man, strong and fit, can march for miles at a pace, and still his target hit.

The best of the best, an elite of force, such a man of strength, not many can last the course, no others march at the same pace, to be swift, but without haste, a Rifleman’s aim, is still a straight ace.

Individuals of men, working as a team, not clockwork soldiers, never forgotten once seen, brave by choice, in battle, they hear histories voice, a Rifleman is a Rifleman, in their blood it runs, like those of the past, chosen ones.

There is a pride, that they can not hide, a Rifleman, best be on your side, history shows how brave they be, regiment and Riflemen in battle, honoured constantly, the bravest of the brave, to them, the VC.

Stoic, where others may fall, a Rifleman obstinacy, his pace and marksmanship shocks all, the action is where he will be, not just a soldier, a Rifleman is he, he serves his country with pride, a Rifleman with rifle, from which you can not hide.

Men of valour, men of strength, men of the Rifle, there is no pretence, skilled with the Rifle of the day, skilled as their forefathers, with their Rifles, they would love to play.

Over the years the Regiments change, a name is a name, but the history is the same, from the 95th to the Rifles of today, Rifle Green worn with pride, in celebration of the Rifleman inside.

Of the Black Mafia, runs the corridors of power, Riflemen have the skills, in rank to climb higher, innovators of thought, new tactics, training, man management sort, the skill of a Rifleman second to naught.

When music you hear fast of pace, men in green marching, proudly determined of face, Riflemen they will be, the elite of the elite, the best of the British Army, to all that have fallen in places afar, your name remembered, for Riflemen you are.

Derrick W Sole, 2018, Copyright Protected

Shot before dawn.

My eyes felt they were about to explode, the pressure in the air through my head did load, the sound wave blow out my eardrums, in my head I felt so numb, showered in dust and falling stone, in a hole on my own.

My hands held my head, I screamed out I’m still here,  not yet dead, then game another one, how much more of this could I take, or do I now begin to run, in bed I find myself, cold sweat bathed in the rays of a warm sun. 

On leave but I don’t want to go back, I’m not a coward, whatever the meaning is of that, I don’t want to but I will, still seeing the faces of those I kill, there are those who depend on me, who I am, I can’t let them see.

On a cold morning tied to a post, a boy not a man, I see his ghost, World war one, a battle not won, too much for such a young man,  shot as a cowed before his life had yet begun.

Still little has changed, staffers in comfort see it as a game, not a hole in the grown, not the smell of death all around, not the never ending noise, someone in no man’s land, crying for help, totally ignored.

To close your eyes, see a screaming face and an out stretched hand, mud waste deep in no man’s land, many dead but not all, not able to help, but clearly you hear their call, the constant rain of falling shell, explosive sounds, a living hell.

The mind shuts down, and no one understands, mess tins together bang, you curl up on the ground, to some just a bit of fun, the final straw, and you run and run, no understanding, just an example out of you, cowardice in the face of the enemy, that won’t do.

Before dawn, you will never see the sun again; a blindfold of rag, over your eyes is drawn, against a wall or tied to a pole, boy or man, you will never get old, the disgrace is not yours, though they say it is so, the officer class, just love a show.

PTSD is nothing new, but still today, many more suffer than a few, you leave the war, but the battle doesn’t leave you, that screaming face you see today, fore ever in your dreams, and won’t go away.

No longer shot a dawn, but can’t find the help that you need, to be rid of those faces, it seems death is the only way to succeed, no long in a corner curled up in a ball, no more screaming, no pain at all, no more tomorrows, high on a building, all you need to do is fall.

Derrick W Sole, copyright protected, 2016.

Photos by MEMORIAL AT PENINSULA LTD

Eight SAS Missions

 Articles  Comments Off on Eight SAS Missions
Jun 142020
 

Eight SAS Missions

(That we know about)

The Special Air Service (SAS) was founded by Colonel David Stirling in 1941 as a regiment of the British Army. They were originally a commando force operating behind Axis lines to sabotage transportation and communications, as well as provide support for Allied troops.
In 1951, they became a special unit for gathering intelligence, engaging in covert operations, combating terrorism, rescuing hostages, and other things that the government would probably never admit to. A secret organization, their existence became public knowledge in 1980 because of the Iranian Embassy. They were so impressive that other countries decided to set up their own versions of the SAS.

1. Egyptian Air Field Raids: 1942

Taken on 18 January 1943, Colonel David Stirling greets a returning SAS jeep patrol

Using American Bantam Jeeps, the SAS attacked five Axis-controlled airfields in Egypt from July 7 to 8, causing the most damage to the one at Bagush. The most successful attacks happened from July 26 to 27, when they hit four more airstrips, including Sidi Haneish and Tamet.
Using the new Lewes bomb (a hand-held explosive and incendiary) over 20 planes at Sidi Haneish were destroyed, with the SAS suffering only one casualty. None of the SAS died at Tamet, but they didn’t have enough bombs to destroy the last plane, so Lieutenant Robert Maynel destroyed the cockpit with his bare hands.

Within 15 months, the SAS destroyed over 250 planes, prompting the Germans to call Stirling the Phantom Major.

2. Malayan Emergency: 1948

A 1950 photo of an Australian Avro Lincoln bomber dropping 500lb bombs on communist insurgents in the Malayan jungle

A 1950 photo of an Australian Avro Lincoln bomber dropping 500lb bombs

on communist insurgents in the Malayan jungle

To rebuild its shattered economy, Britain demanded more of its colonies, forcing many independence movements to become militant. With support from the Soviets, Malayan communist groups fought back. Britain’s response was to call in the army, but that wasn’t enough, so the SAS, disbanded after WWII, was reestablished.

Since much of the fighting took place in the jungles where tin mines and rubber plantations (Malaya’s main source of wealth) were located, small SAS squads were deployed there. Many befriended the locals so they could help engage in search and destroy missions against the insurgents.

They also provided ground support for the Air Force which used Agent Orange (a defoliant) for the first time. Though the insurgency failed, Britain lost Malaya, anyway.

3. Assault on Jebel Akhdar: 1957

A Shackleton belonging to 224 Sqduadron flying in formation near Masirah during the Jebel Akhdar campaign

A Shackleton belonging to 224 Squadron flying in formation

near Masirah during the Jebel Akhdar campaign

Britain created an alliance with Oman in the 18th century, so when rebels took over three forts on Mt. Jebel Akhdar in 1957, Oman called for help.

Since the British were supposed to be leaving Oman, they sent 64 SAS men instead. On January 26, every member of D Squadron walked up 7,000 feet of uphill terrain carrying some 119lbs of equipment, which caused some to faint from exhaustion.

A rebel sniper hit a grenade in one of the SAS men’s pack, killing two and injuring another. The forts of Saiq and Bani Habib were taken. But Jebel Akhdar took longer.

After making feint operations against outlying positions on the north side of the Jebel Akhdar, they scaled the southern face of the Jebel at night, taking the rebels by surprise. Supplies were parachuted to them once they reached the plateau, which may have misled some of the rebels into thinking that this was an assault by paratroops.

There was little further fighting. Talib and his fighters either melted back into the local population or fled to Saudi Arabia. Imam Ghalib went into exile in Saudi Arabia.

4. Indonesia-Malaysia Confrontation

Taken in August 1964 during the Indonesian Confrontation, a British soldier is winched aboard a Westland Wessex HAS3 of 845 Naval Air Squadron

Taken in August 1964 during the Indonesian Confrontation,

a British soldier is winched aboard a Westland Wessex HAS3 of 845 Naval Air Squadron

In 1961, the British and Malayan governments agreed to create a federation called Malaysia, which included Brunei, North Borneo, Sarawak, and Singapore. Some within the areas to be absorbed weren’t happy about it and a rebellion broke out on 8 December 1962.

Though quickly suppressed, it encouraged Indonesia to send in troops to conduct raids and encourage further insurrections. The SAS were sent to the jungles to befriend the tribes people and get their help in securing the borders.

Indonesia stepped up its invasion, forcing the SAS to cross over and bring the war to them. Aided by the military and air support, the SAS caused havoc, which resulted in a coup that ousted Indonesian President Sukarno. On 3 September 1966, the war ended.

5. Lufthansa Flight 181

The Lufthansa plane on 18 October 1977 after the rescue. Disembarking are the freed hostages and members of the GSG-9 team

The Lufthansa plane on 18 October 1977 after the rescue.

Disembarking are the freed hostages and members of the GSG-9 team

On 13 October 1977, four Palestinian terrorists hijacked Lufthansa Flight 181. They demanded the release of their comrades held in Germany and Turkey, as well as $15 million in ransom. They also ordered the plane to fly to various countries, including Aden, where the captain was shot, forcing the co-pilot to fly on to Mogadishu, Somalia alone.

Following them was an elite German anti-terrorist unit, the GSG-9, and two men from SAS. When the plane landed at Mogadishu, it was stormed by the unit who blew in the emergency doors and opened fire. Three terrorists were killed, one was captured, while four hostages and one GSG-9 man was hurt.

The dramatic rescue operation is also called Operation Feuerzauber, which means Fire Magic.

6. Iranian Embassy Siege

Members of the SAS entering the Iranian embassy 

On 30 April 1980, six Arab-Iranians stormed the Iranian Embassy in London, calling for the independence of Khūzestān Province from Iran. They took 26 people hostage, wanted safe passage out of Britain, and made other demands. By the sixth day, they became more agitated as their requirements were not met, so they shot one hostage and threw his body onto the street.

The SAS stepped in and broke into the embassy, using CS gas and stun grenades to clear their way. They killed five of the terrorists and took the sixth alive. The rescue involved some 30 to 35 SAS members and took only 17 minutes.

Also called Operation Nimrod, this incident would bring the SAS to the spotlight and make them a matter of public knowledge.

7. Pebble Island Raid

In 1982, Argentina invaded the Falklands and established an airstrip on Pebble Island for FMA IA 58 Pucará light ground attack aircraft and T-34 Mentors. These could compromise British operations to take back the islands, so the SAS were sent to neutralize them.

On May 14, 45 members of the D Squadron were flown by helicopters some 3.7 miles from the airstrip. Armed with L16 81mm Mortar bombs, Rocket 66mm HEAT L1A1 Light Anti-tank Weapons, M-16 rifles, and M203 grenade launchers, they attacked the planes, fuel stores, and ammunition dump.

They destroyed six Pucarás, four Turbo Mentors, and a Short SC 7 Skyvan utility transport plane, with only some injuries to themselves and one Argentine casualty. It was over the next day.

8. Sierra Leone Hostage Rescue

On 25 August 2000, 11 members of the 1st Royal Irish Regiment were in Sierra Leone as part of a UN peacekeeping mission when they were taken hostage by The West Side Boys rebel group. Five were released, but when negotiations soured, the rebels threatened to kill the rest.

The SAS and the Special Boat Service (SBS) took inflatable boats to get near the rebel camp and observed the situation. They attacked on September 10 supported by two Chinook helicopters, three Lynx helicopters, and an Mi-24 Hind gunship. Paratroopers from the Parachute Regiment attacked a neighboring camp to keep them from helping their comrades.

Also called Operation Barras, there was only one SAS casualty, but all the hostages were freed.

Sourced from War History on line

HRH Prince Philip

 Articles  Comments Off on HRH Prince Philip
Jun 102020
 

HRH Prince Philip

Happy Birthday HRH Prince Philip, The Duke of Edinburgh

Colonel-in-Chief of The Rifles

Pictured with Sir Nick Carter, Chief of the Defence Staff at the Sounding Retreat 2016.

HRH The Duke of Edinburgh, inspecting a Company of  the 1st Battalion the Rifle Brigade (1RB) at Kuala Lumpur, 1st November 1956, he also met with a some families of warrant officers and senior NCO`s  in the Battalion. The Rifle Brigade a antecedent Regiment of The Rifles

Picture credited to the Rifles Instagram 

Pictures credited to the RGJ Rifles Museum

Heritage of The Rifles: Bugles in The Rifles

A bugle appears on the cap badge of The Rifles. The Regimental band is the ‘Band and Bugles of The Rifles’. Bugles play an important part in the modern Regiment and the antecedents of the past. But where do bugles come from and why are they so important to The Rifles?

In the 17th and 18th century, most line infantry regiments used drums to send orders on the battlefield. However, for light troops, operating in difficult terrain, such as thick forests, drums were too bulky and impractical. In the early to mid-17th century, various German states established units of light troops, known as jägers (‘hunters’). They were often recruited from among the middle class and minor nobility, as these men were experienced hunters and could afford to buy their own rifles, which were rare and extremely expensive at the time. Jägers would communicate with each other over long distances with hunting horns. These were very simple instruments, often constructed from curved animal horns or tusks. Hunting horns were sometimes known as bugles, coming from the Latin for bullock (‘buculus’), as bull’s horns were often used. Horns of this type had been common across Europe since at least the Middle Ages.

By the early 18th century, as German jäger units were becoming more standardized, hunting horns started to be replaced by large, brass, curved bugles, known as halbmondbläser (‘half-moon bugles’). The British Army first adopted bugles in 1756, during the Seven Years’ War, when British troops were fighting side by side with various German allies in Europe. These took the form of what we would think of today as a bugle – a curled brass tube, without valves, ending in a funnel-shaped mouth.

During the same period, the 60th (Royal American) Regiment had been raised and, along with other irregular ranger units, were operating in the Canadian wilderness. Many of the officers were German and Swiss, who began instructing the 60th in the ways of irregular warfare. The use of hunting horns, easily obtainable, were incorporated into their tactics.

Although a more modern design of the bugle had now been adopted by the British Army, the symbol of the earlier hunting horn became synonymous with light infantry and rifle units. Consequently, with the formation of the Experimental Corps of Riflemen in 1802, they adopted the bugle as their cap badge. Bugles, of various designs, would go on to feature on the cap badges of many of the antecedent regiments of The Rifles. These included the Somerset Light infantry, Durham Light Infantry, King’s Own Yorkshire Light Infantry and the Royal Green Jackets, to name just a few. Today, of course, it can be seen on the cap badge of The Rifles.

Bugles remained in use in the British Army throughout the 18th and 19th centuries, and into 20th century. They were last carried into combat by British troops in the First World War. Although today their battlefield use has been overtaken by more modern technology, they remain a feature of life in The Rifles, for example in the Band and Bugles of The Rifles, on parade and for special ceremonial purposes.

Today the bugle serves as a symbol in The Rifles of a way of warfare that is flexible, forward thinking and quick on its feet – just like the hunters who once carried them!

Examples of cap badges of antecedent regiments of The Rifles, each featuring a bugle. Top left: Durham Light Infantry. Top right: King’s Own Yorkshire Light Infantry. Bottom left: Somerset Light Infantry (Prince Albert’s). Bottom right: Royal Green Jackets. The KOYLI cap badge is highly unusual, as it features a brass French hunting horn/bugle, rather than the older design of horn seen on most others.

An example of an early 18th century German halbmondbläser (‘half-moon bugles’), one of the predecessors of the modern bugle.

A Medieval hunting scene, as depicted in ‘Livre de Chasse’ – a treatise on hunting, written by Gaston III, Count of Foix, in 1387. Note the hunting horns being used by the mounted figures in background and the hunter on foot in the foreground.

Sourced from the Rifles Museum Facebook 

Pictures credited to the rifles Museum 

Secret History The Troubles Episodes 1 to 4

 Articles  Comments Off on Secret History The Troubles Episodes 1 to 4
Jun 082020
 

Spotlight

on

The Troubles Episode One

Fifty years after troops were sent onto the streets of Northern Ireland, a leading team of investigative journalists uncover secrets about the decades-long conflict that claimed more than 3,700 lives. Reporter Darragh MacIntyre opens the series, discovering an array of new evidence, including previously classified documents, unseen film and fresh testimony from key new witnesses to the origins of the Troubles. It throws light on the formation of the Provisional Irish Republican Army as well as the parts played by radicals who became elder statesmen like Ian Paisley and Martin McGuinness.

In this episode, the Spotlight team traces how, in the 1960s, suspicion led to unrest between unionists and nationalists, undermining Northern Ireland’s government. The arrival of the British Army in August 1969 brought a respite, and the soldiers were enthusiastically greeted as protectors by many nationalists. That relationship was soured by fatal errors and calculated acts of violence. New information about Martin McGuinness’s role at that time is brought to light, and the episode concludes with the destruction of the Northern Ireland government, a moment when IRA members believed they were about to force the British Army out of Northern Ireland.

Broadcast date: 10th September 2019 Credits to BBC Northern Ireland

The Troubles Episode Two

Reporter Darragh MacIntyre finds the IRA anticipating that 1972 would be their `year of victory’, only to be countered by a massive British military response in the midst of what became the bloodiest period of the conflict.
The programme features previously unseen footage and new discoveries around the secret talks between the government and the IRA about British withdrawal, including interviews with the people who were there. Were the talks a serious offer or a ruse to weaken the IRA by dragging them into protracted negotiations?
One insider’s secret diary provides a fresh insight into a missed opportunity for peace. Then, as sectarian fighting with Protestant loyalists began to increase, a coup inside the IRA sets the stage for what they called ‘the Long War’.

Broadcast date: 17th September 2019 BBC Northern Ireland

The Troubles Episode Three

When Margaret Thatcher entered Downing Street in 1979, she was confronted by an IRA prepared to conduct a long war of attrition against Britain. Jennifer O’Leary discovers arms connections in America and Libya and speaks directly to individuals involved in smuggling weapons for the IRA. She also hears an astonishing admission about the Brighton bomb, which almost killed Mrs Thatcher, and other attacks in Britain.

Out of the IRA hunger strikes, Irish republicans also developed the parallel political strategy that saw their leader, Gerry Adams, elected to parliament. Success at the ballot box began to build tension inside the IRA between those who wanted to build their political path and those who primarily adhered to their long war.

Originally broadcast on BBC Northern Ireland 24th Sep 2019

The Troubles Episode Four

New revelations about how agents of British intelligence infiltrated the Irish Republican Army. By 1979, the British security forces believed the IRA had become so security conscious that they were impossible to penetrate. But reporter Jennifer O’Leary reveals how one weakness in the IRA’s internal security was exploited to unlock many of the group’s secrets. She charts how Britain used informers and combined that advantage in secret intelligence with the use of special forces to take on one of the IRA’s deadliest units – a strategy that culminated with the Loughgall ambush, when the SAS killed eight IRA men attacking a police station. The programme shows that the aftermath of the attack only made the IRA’s informer problem worse.

Originally broadcast on BBC Northern Ireland 1st Oct 2019


Sourced from You Tube Credits to BBC

British Army Press Gangs (WWII)

 Articles  Comments Off on British Army Press Gangs (WWII)
May 272020
 

Britain’s violent conscription of African soldiers is finally coming to light
During World War II, the British army press-ganged African men and stationed them in battlefields far from home. Today, their testimonies are finally being heard.

By Jack Losh

Picture credited to Getty Images

More than seven decades on, Grace Mbithe still remembers the moment when a press gang abducted her husband from a Kenyan village and forced him into Britain’s armed forces at the height of World War Two. “It would just happen suddenly, one morning,” she said. “If you hid, they would just come back another day.”

Grace, now a widow in her mid-90s, described a lorry driving into their highland village before soldiers jumped out and grabbed as many fit and able men as possible—under the supervision of a white officer.

It would be several years before Grace saw her husband, Stanley, again. During this turbulent time, she was socially isolated and tormented by her in-laws who, believing Grace was infertile, tried to force her out of the family. “We cried a lot when we heard (Stanley) had been captured,” she said. “We were crying because we knew he would not come back. He would die. He left us with a lot of problems. I suffered so much.”

Stanley was not the only man to suffer the injustice of enforced recruitment.

After carving up the continent in the late 19th century, European powers recruited African men to provide internal security and protect their colonies from outside attack. During WWII, Britain used these troops—numbering over 600,000—to fight Axis forces in the Horn of Africa, Madagascar and Burma, as well as using them to provide garrison troops in the Middle East.

Page detailing different African regiments from The Infantry of East Africa Command official pamphlet, The Ministry of Information, 1944.

Propaganda was one recruitment tactic; another was highlighting the social status and economic opportunities that military employment could provide. But by far the most controversial and clandestine method was force. The official line was that enlistment would be voluntary. But colonial officials often pressured local chiefs to find them men, and turned a blind eye to how they filled their quotas.

The result was African men put in the firing line against their will, in battlefields far from home. Some are still alive today, their disturbing testimonies corroborated by historical research. “While conscription across Africa was generally avoided, it would be quite wrong to infer that all recruitment was voluntary,” says David Killingray, Emeritus professor of modern history at Goldsmiths University, who described the experience of individuals caught up by this system as “appalling.”

Britain would go on to pay these soldiers an end-of-war bonus according to their rank, length of service and ethnicity, meaning black troops received just a third of the pay of their white counterparts. Many faced beatings by their superiors and public floggings. Such revelations, which recently featured in a documentary for Al Jazeera English, have triggered calls for the government to make an official apology and pay compensation to the last surviving veterans.

“These are men who were prepared to make the ultimate sacrifice for our freedoms. It would seem appropriate that these freedoms now should be used to compensate them for their unjust treatment in the past,” Chi Onwurah, Labour MP for Newcastle upon Tyne Central, who has senior roles in the cross-party parliamentary groups for the Commonwealth and for Africa, told the New Statesman.

“Putting an actual price on soldiers’ service reveals the deep prejudice at the heart of the services at that time. The government should launch an inquiry and apologise.” In February, following the release of the film, three shadow secretaries of state also called on their Conservative counterparts to acknowledge the systematic discrimination of Britain’s WWII African veterans, to offer them financial compensation and to make an official apology.

One Kenyan veteran called Gershon Fundi, now 93, was not among Britain’s willing recruits; he was effectively tricked into wartime service. “We were not happy being in that war,” he said. “They were treating us as slaves. We were there not because we wanted to be there. But we were forced to go there.”

In 1943, aged just 17, Gershon says a local administrator offered him a job in “communications” but did not specify what this would entail. He took the job, eager for paid work away from impoverished drudgery, and showed up at the given address on his first day. “When I got there that’s when I realised I was in the army,” he said. By then it was too late. He was ordered to sign a contract, banned from leaving, and sent off to Ethiopia and Somaliland as a signalman.

“If you run, even if you go to home, chiefs would arrest you and then you’re going to be brought back,” he said. “But how can you complain? To whom are you going to complain? To whom? Because you had no power. You would not be able to reach those high-ranking officers. We have no voice, we have no voice at all.”

Gershon’s hapless entry into army life came a year after the East African Governors Conference had asked for permission to use full-scale conscription; Britain’s Secretary of State for the Colonies decided to leave the matter in the hands of the individual administrations in each colonial territory, even though a League of Nations mandate prevented the conscription of “protected” peoples, which was the official designation of Africans living under British control.

The cruelty of this policy was compounded by local elders, who were ordered, with minimal oversight, to fill manpower quotas. “Traditional authorities often got rid of men who displeased them,” said Professor Timothy Parsons, a leading authority on Britain’s east African army, based at Washington University in St. Louis. Several of his interviewees “recall being conscripted as a result of disputes over land or women.”

Recruitment was also driven by racist profiling. As one officer of the King’s African Rifles (KAR) wrote in 1940: “The blacker their face, the huskier their voice, the thicker their neck, the darker their skin and the more remote parts of Africa they come from – the better soldier they made.”

Likewise, Britain produced recruitment propaganda that promoted service in the “modern” colonial forces as a means of remaking and advancing “savage tribesmen”. One official pamphlet showed a picture of a Zulu soldier in a traditional outfit captioned with the phrase, “The Raw Material”; the next page shows a picture of African soldiers dressed in British Army fatigues, with the caption, “The Finished Product.” Such prejudiced stereotypes would also help justify the decision to pay these men less and treat them differently.

During their WWII service, Britain’s African soldiers faced corporal punishment, despite the British Army officially outlawing this decades earlier. Such abuse went beyond the occasional clip around the ear. Beatings and public floggings were commonplace.

“Our legs would be swollen—our buttocks too,” said Muchara Ntiba, a 97-year-old Kenyan combat veteran who served in Britain’s campaigns in Burma and East Africa. “We would give them the palms of our hands to be beaten, Afterwards, even an attempt to hold something would be hard.”

Corporal punishment has a long and ugly history in Britain’s African colonies, much of it uncovered by Parsons. His research shows that beatings and floggings were almost banned entirely in WWI because they had got so out of hand. The Director of Military Labour, Colonel O. F. Watkins, wrote a circular in June 1917 warning officers “that if the practice continues an example will be made.” He laid out new rules, including not to inflict corporal punishment before previous lashes had healed; never to flog non-commissioned officers before first reducing them in rank; and never to use it in “hot blood” or to “punish an act of well-intentioned stupidity”.

Corporal punishment was effectively banned in the inter-war years. This was despite objections from the government in Nyasaland (modern-day Malawi), which opposed any limitation of flogging, and from some senior personnel in Kenya where, in 1932, “twenty strokes” could still be used as summary punishment.

Reflecting the era’s views of Africans, one lieutenant colonel wrote in January 1934: “The abolition of corporal punishment in the King’s African Rifles is viewed with deep regret; this form of punishment was one which the native, a true oriental, as opposed to occidental, understood and appreciated; there is not the slightest doubt that he bore no resentment at all at receiving a whipping.”

Despite some protests, corporal punishment returned with a vengeance in WWII. The UK’s East African Force lobbied for its use as a summary disciplinary measure, despite being aware of the controversy around such harsh discipline. “We know how close a watch is being kept by certain organisations, and persons, for any evidence, or alleged evidence, that colour discrimination is still being maintained,” wrote one colonial official in September 1940.

Over the coming year, senior commanders argued about the legitimacy of using corporal punishment. Whitehall delivered the final ruling in February 1941, saying that the “power to award corporal punishment shall be confined to courts-martial,” and refusing to extend such powers to commanding officers. And yet, a circular a few months later warned that commanders were still making illegal use of summary corporal punishment.

The problem would persist for years. In 1943, an English-born missionary made a formal complaint about the public flogging of African soldiers, with threats to go to the press about such “sadism.”

The pro-beating constituency tended to be officers recruited from the white settler communities; those brought in from mainland Britain were less vested in the colour bar and discriminatory hierarchy of the colonial state. “Take cases like Kenya or Rhodesia, where the settlers could be extremely brutal and were could be a law unto themselves,” said Parsons. “There were notorious incidents in Kenya where settlers beat Africans to death and were either not punished or punished by small sentences like manslaughter.”

This abuse was not formally abolished in Kenya until December 1946. A few months before, a Colonial Office report said that the service of Africans “in this war side by side with British soldiers entitles them to be treated in this respect as British soldiers, and not alone among the colonial forces to remain subject to this punishment.” Corporal punishment, however, would still be permitted in military prisons until April 1948.

As for Ntiba, the elderly Kenyan combat veteran, his salvation from such brutal maltreatment came in the form of an officer and a medic. “A captain ordered the whipping to stop,” he said. “And a doctor said no one should hit any soldiers. People were being badly hurt.”

But for some, the end of the war simply marked the start of a new struggle. Grace Mbithe’s husband, Stanley, was finally released from the ranks, having been pressganged years earlier, but would bring the trauma of conflict into the family home. “He came back unwell,” Grace told me in her ramshackle home. “His heart beat so loudly. At night we couldn’t sleep. This happened when he remembered what he had gone through.”

As rain thundered against their corrugated metal roof, storms proved most distressing for this young veteran who never wanted to go to war. “If he heard it while we were sleeping, he would get up, he would go outside and it would rain on him over and over again, while his heart beat faster and faster,” said Grace. “He had a bad heart and that’s what killed him.”

The government refused to comment specifically on any of the allegations. A spokesperson told the New Statesman: “The UK is indebted to all those servicemen and women from Africa who volunteered to serve with Britain during the Second World War. Their bravery and sacrifice significantly contributed to the freedoms that we all enjoy today”.

Sourced from New Statesman

Operation Dynamo

 Articles  Comments Off on Operation Dynamo
May 262020
 

Operation Dynamo

Allied evacuation of Dunkirk

Fair use Picture from Wikipedia

The Dunkirk evacuation, code-named Operation Dynamo and also known as the Miracle of Dunkirk, was the evacuation of Allied soldiers during World War II from the beaches and harbour of Dunkirk, in the north of France, between 26 May and 4 June 1940. The operation commenced after large numbers of Belgian, British, and French troops were cut off and surrounded by German troops during the six-week Battle of France. In a speech to the House of Commons, British Prime Minister Winston Churchill called this “a colossal military disaster”, saying “the whole root and core and brain of the British Army” had been stranded at Dunkirk and seemed about to perish or be captured. In his “we shall fight on the beaches” speech on 4 June, he hailed their rescue as a “miracle of deliverance”.

After Nazi Germany invaded Poland in September 1939, France and the British Empire declared war on Germany and imposed an economic blockade. The British Expeditionary Force (BEF) was sent to help defend France. After the Phoney War of October 1939 to April 1940, Germany invaded Belgium, the Netherlands, and France on 10 May 1940. Three panzer corps attacked through the Ardennes and drove northwest to the English Channel. By 21 May, German forces had trapped the BEF, the remains of the Belgian forces, and three French field armies along the northern coast of France. BEF commander General Viscount Gort immediately saw evacuation across the Channel as the best course of action, and began planning a withdrawal to Dunkirk, the closest good port.

Late on 23 May, a halt order was issued by Generaloberst Gerd von Rundstedt, commander of Army Group A. Adolf Hitler approved this order the next day, and had the German High Command send confirmation to the front. Destroying the trapped BEF, French, and Belgian armies was left to the Luftwaffe until the order was rescinded on 26 May. This gave Allied forces time to construct defensive works and pull back large numbers of troops to fight the Battle of Dunkirk. From 28 to 31 May, in the Siege of Lille, the remaining 40,000 men of the once-formidable French First Army fought a delaying action against seven German divisions, including three armoured divisions.

On the first day only 7,669 Allied soldiers were evacuated, but by the end of the eighth day, 338,226 had been rescued by a hastily assembled fleet of over 800 vessels. Many troops were able to embark from the harbour’s protective mole onto 39 British Royal Navy destroyers, 4 Royal Canadian Navy destroyers, at least 3 French Navy destroyers, and a variety of civilian merchant ships. Others had to wade out from the beaches, waiting for hours in shoulder-deep water. Some were ferried to the larger ships by what became known as the Little Ships of Dunkirk, a flotilla of hundreds of merchant marine boats, fishing boats, pleasure craft, yachts, and lifeboats called into service from Britain. The BEF lost 68,000 soldiers during the French campaign and had to abandon nearly all of its tanks, vehicles, and equipment. In his 4 June speech, Churchill also reminded the country that “we must be very careful not to assign to this deliverance the attributes of a victory. Wars are not won by evacuations.”

In September 1939, after Nazi Germany invaded Poland, the United Kingdom sent the British Expeditionary Force (BEF) to aid in the defence of France, landing at Cherbourg, Nantes, and Saint-Nazaire. By May 1940 the force consisted of ten divisions in three corps under the command of General John Vereker, 6th Viscount Gort. Working with the BEF were the Belgian Army and the French First, Seventh, and Ninth Armies.

During the 1930s, the French had constructed the Maginot Line, a series of fortifications along their border with Germany. This line had been designed to deter a German invasion across the Franco-German border and funnel an attack into Belgium, which could then be met by the best divisions of the French Army. Thus, any future war would take place outside of French territory, avoiding a repeat of the First World War. The area immediately to the north of the Maginot Line was covered by the heavily wooded Ardennes region, which French General Philippe Pétain declared to be “impenetrable” as long as “special provisions” were taken. He believed that any enemy force emerging from the forest would be vulnerable to a pincer attack and destroyed. The French commander-in-chief, Maurice Gamelin, also believed the area to be of a limited threat, noting that it “never favoured large operations”. With this in mind, the area was left lightly defended.

The initial plan for the German invasion of France called for an encirclement attack through the Netherlands and Belgium, avoiding the Maginot Line. Erich von Manstein, then Chief of Staff of the German Army Group A, prepared the outline of a different plan and submitted it to the OKH (German High Command) via his superior, Generaloberst Gerd von Rundstedt.Manstein’s plan suggested that panzer divisions should attack through the Ardennes, then establish bridgeheads on the Meuse River and rapidly drive to the English Channel. The Germans would thus cut off the Allied armies in Belgium. This part of the plan later became known as the Sichelschnitt (“sickle cut”). Adolf Hitler approved a modified version of Manstein’s ideas, today known as the Manstein Plan, after meeting with him on 17 February.

On 10 May, Germany invaded Belgium and the Netherlands. Army Group B, under Generaloberst Fedor von Bock, attacked into Belgium, while the three panzer corps of Army Group A under Rundstedt swung around to the south and drove for the Channel. The BEF advanced from the Belgian border to positions along the River Dyle within Belgium, where they fought elements of Army Group B starting on 10 May. They were ordered to begin a fighting withdrawal to the Scheldt River on 14 May when the Belgian and French positions on their flanks failed to hold. During a visit to Paris on 17 May, Prime Minister Winston Churchill was astonished to learn from Gamelin that the French had committed all their troops to the ongoing engagements and had no strategic reserves.

On 19 May, Gort met with French General Gaston Billotte, commander of the French First Army and overall coordinator of the Allied forces. Billotte revealed that the French had no troops between the Germans and the sea. Gort immediately saw that evacuation across the Channel was the best course of action, and began planning a withdrawal to Dunkirk, the closest location with good port facilities. Surrounded by marshes, Dunkirk boasted old fortifications and the longest sand beach in Europe, where large groups could assemble. On 20 May, on Churchill’s suggestion, the Admiralty began arranging for all available small vessels to be made ready to proceed to France. After continued engagements and a failed Allied attempt on 21 May at Arras to cut through the German spearhead, the BEF was trapped, along with the remains of the Belgian forces and the three French armies, in an area along the coast of northern France and Belgium.

Lord Gort (gesturing, at centre) was commander of the British Expeditionary Force.

Picture credited to the War Office

Without informing the French, the British began planning on 20 May for Operation Dynamo, the evacuation of the BEF. This planning was headed by Vice Admiral Bertram Ramsay at the naval headquarters below Dover Castle, from which he briefed Churchill as it was under way. Ships began gathering at Dover for the evacuation. On 20 May, the BEF sent Brigadier Gerald Whitfield to Dunkirk to start evacuating unnecessary personnel. Overwhelmed by what he later described as “a somewhat alarming movement towards Dunkirk by both officers and men”, due to a shortage of food and water, he had to send many along without thoroughly checking their credentials. Even officers ordered to stay behind to aid the evacuation disappeared onto the boats.

On 22 May, Churchill ordered the BEF to attack southward in coordination with the French First Army under General Georges Blanchard to reconnect with the remainder of the French forces. This proposed action was dubbed the Weygand Plan after General Maxime Weygand, appointed Supreme Commander after Gamelin’s dismissal on 18 May. On 25 May, Gort had to abandon any hope of achieving this objective and withdrew on his own initiative, along with Blanchard’s forces, behind the Lys Canal, part of a canal system that reached the sea at Gravelines. Sluice gates had already been opened all along the canal to flood the system and create a barrier (the Canal Line) against the German advance.

Battle of Dunkirk

By 24 May, the Germans had captured the port of Boulogne and surrounded Calais. The engineers of the 2nd Panzer Division under Generalmajor Rudolf Veiel built five bridges over the Canal Line and only one British battalion barred the way to Dunkirk. On 23 May, at the suggestion of Fourth Army commander Generalfeldmarschall Günther von Kluge, Rundstedt had ordered the panzer units to halt, concerned about the vulnerability of his flanks and the question of supply to his forward troops. He was also concerned that the marshy ground around Dunkirk would prove unsuitable for tanks and he wished to conserve them for later operations (in some units, tank losses were 30–50 per cent). Hitler was also apprehensive, and on a visit to Army Group A headquarters on 24 May, he endorsed the order.

Air Marshal Hermann Göring urged Hitler to let the Luftwaffe (aided by Army Group B) finish off the British, to the consternation of General Franz Halder, who noted in his diary that the Luftwaffe was dependent upon the weather and aircrews were worn out after two weeks of battle. Rundstedt issued another order, which was sent uncoded. It was picked up by the Royal Air Force (RAF) Y service intelligence network at 12:42: “By order of the Fuhrer … attack north-west of Arras is to be limited to the general line Lens–Bethune–Aire–St Omer–Gravelines. The Canal will not be crossed.” Later that day, Hitler issued Directive 13, which called for the Luftwaffe to defeat the trapped Allied forces and stop their escape. At 15:30 on 26 May, Hitler ordered the panzer groups to continue their advance, but most units took another 16 hours to attack. The delay gave the Allies time to prepare defences vital for the evacuation and prevented the Germans from stopping the Allied retreat from Lille.

The halt order has been the subject of much discussion by historians. Guderian considered the failure to order a timely assault on Dunkirk to be one of the major German mistakes on the Western Front. Rundstedt called it “one of the great turning points of the war”, and Manstein described it as “one of Hitler’s most critical mistakes”. B. H. Liddell Hart interviewed many of the generals after the war and put together a picture of Hitler’s strategic thinking on the matter. Hitler believed that once Britain’s troops left continental Europe, they would never return.

Evacuation
26–27 May

The retreat was undertaken amid chaotic conditions, with abandoned vehicles blocking the roads and a flood of refugees heading in the opposite direction. Due to wartime censorship and the desire to keep up British morale, the full extent of the unfolding disaster at Dunkirk was not initially publicised. A special service attended by King George VI was held in Westminster Abbey on 26 May, which was declared a national day of prayer. The Archbishop of Canterbury led prayers “for our soldiers in dire peril in France”. Similar prayers were offered in synagogues and churches throughout the UK that day, confirming to the public their suspicion of the desperate plight of the troops. Just before 19:00 on 26 May, Churchill ordered Dynamo to begin, by which time 28,000 men had already departed. Initial plans called for the recovery of 45,000 men from the BEF within two days, at which time German troops were expected to block further evacuation. Only 25,000 men escaped during this period, including 7,669 on the first day.

On 27 May, the first full day of the evacuation, one cruiser, eight destroyers, and 26 other craft were active. Admiralty officers combed nearby boatyards for small craft that could ferry personnel from the beaches out to larger craft in the harbour, as well as larger vessels that could load from the docks. An emergency call was put out for additional help, and by 31 May nearly four hundred small craft were voluntarily and enthusiastically taking part in the effort.

The same day, the Luftwaffe heavily bombed Dunkirk, both the town and the dock installations. As the water supply was knocked out, the resulting fires could not be extinguished. An estimated thousand civilians were killed, one-third of the remaining population of the town. RAF squadrons were ordered to provide air supremacy for the Royal Navy during evacuation, their efforts shifted to tightly covering Dunkirk and the English Channel, protecting the ships of the evacuation fleet as much as possible. The Luftwaffe was met by 16 squadrons of the Royal Air Force, who claimed 38 kills on 27 May while losing 14 aircraft. Many more RAF fighters sustained damage and were subsequently written off. On the German side, Kampfgeschwader 2 (KG 2) and KG 3 suffered the heaviest casualties. German losses amounted to 23 Dornier Do 17s. KG 1 and KG 4 bombed the beach and harbour and KG 54 sank the 8,000-ton steamer Aden. Junkers Ju 87 Stuka dive bombers sank the troopship Cote d’ Azur. The Luftwaffe engaged with 300 bombers which were protected by 550 fighter sorties and attacked Dunkirk in twelve raids. They dropped 15,000 high explosive and 30,000 incendiary bombs, destroying the oil tanks and wrecking the harbour. No. 11 Group RAF flew 22 patrols with 287 aircraft this day, in formations of up to 20 aircraft.

Troops evacuated from Dunkirk arrive at Dover, 31 May 1940

Altogether, over 3,500 sorties were flown in support of Operation Dynamo. The RAF continued to inflict a heavy toll on the German bombers throughout the week. Soldiers being bombed and strafed while awaiting transport were for the most part unaware of the efforts of the RAF to protect them, as most of the dogfights took place far from the beaches. As a result, many British soldiers bitterly accused the airmen of doing nothing to help.

On 25 and 26 May, the Luftwaffe focused their attention on Allied pockets holding out at Calais, Lille, and Amiens, and did not attack Dunkirk. Calais, held by the BEF, surrendered on 26 May. Remnants of the French First Army, surrounded at Lille, fought off seven German divisions, several of them armoured, until 31 May, when the remaining 35,000 soldiers were forced to surrender after running out of food and ammunition. The Germans accorded the honours of war to the defenders of Lille in recognition of their bravery.

8 May – 4 June

The Belgian Army surrendered on 28 May, leaving a large gap to the east of Dunkirk. Several British divisions were rushed in to cover that side. The Luftwaffe flew fewer sorties over Dunkirk on 28 May, switching their attention to the Belgian ports of Ostend and Nieuport. The weather over Dunkirk was not conducive to dive or low-level bombing. The RAF flew 11 patrols and 321 sorties, claiming 23 destroyed for the loss of 13 aircraft. On 28 May, 17,804 soldiers arrived at British ports.

On 29 May, 47,310 British troops were rescued as the Luftwaffe’s Ju 87s exacted a heavy toll on shipping. The British destroyer HMS Grenade was sunk and the French destroyer Mistral was crippled, while her sister ships, each laden with 500 men, were damaged by near misses. British destroyers Jaguar and Verity were badly damaged but escaped the harbour. Two trawlers disintegrated in the attack. Later, the passenger steamer SS Fenella sank with 600 men aboard at the pier but the men were able to get off. The paddle steamer HMS Crested Eagle suffered a direct hit, caught fire, and sank with severe casualties. The raiders also destroyed the two rail-owned ships, the SS Lorina and the SS Normannia. Of the five major German attacks, just two were contested by RAF fighters; the British lost 16 fighters in nine patrols. German losses amounted to 11 Ju 87s destroyed or damaged.

On 30 May, Churchill received word that all British divisions were now behind the defensive lines, along with more than half of the French First Army.[78] By this time, the perimeter ran along a series of canals about 7 miles (11 km) from the coast, in marshy country not suitable for tanks. With the docks in the harbour rendered unusable by German air attacks, senior naval officer Captain (later Admiral) William Tennant initially ordered men to be evacuated from the beaches. When this proved too slow, he re-routed the evacuees to two long stone and concrete breakwaters, called the east and west moles, as well as the beaches. The moles had never been designed to dock ships, but despite this, the majority of troops rescued from Dunkirk were taken off in this way; according to legend, it was the Little Ships which did this achievement. According to the historical record, almost 200,000 troops embarked on ships from the east mole (which stretched nearly a mile out to sea) over the next week. James Campbell Clouston, pier master on the east mole, a narrow wooden walkway mounted on a concrete breakwater, not designed to be used by ships, but the only part of the port that had not been heavily bombed by the Luftwaffe, organised and regulated the flow of men along the mole into the waiting ships, for the next five days. Once more, low clouds kept Luftwaffe activity to a minimum. Nine RAF patrols were mounted, with no German formation encountered. The following day, the Luftwaffe sank one transport and damaged 12 others for 17 losses; the British claimed 38 kills, which was an exaggeration. The RAF and Fleet Air Arm lost 28 aircraft.

Of the total 338,226 soldiers, several hundred were unarmed Indian mule handlers on detachment from the Royal Indian Army Service Corps, forming four of the six units of Force K-6 transport. Cypriot muleteers were also present. Three units were successfully evacuated and one captured. Also present at Dunkirk were a small number of French Senegalese soldiers and Moroccans.

The next day, an additional 53,823 men were embarked, including the first French soldiers. Lord Gort and 68,014 men were evacuated on 31 May, leaving Major-General Harold Alexander in command of the rearguard. A further 64,429 Allied soldiers departed on 1 June, before the increasing air attacks prevented further daylight evacuation. The British rearguard of 4,000 men left on the night of 2–3 June. An additional 75,000 French troops were retrieved over the nights of 2–4 June, before the operation finally ended. The remainder of the rearguard, 40,000 French troops, surrendered on 4 June. Churchill made a point of stating in his “We shall fight on the beaches” address in the House on 4 June that the evacuation had been made possible through the efforts of the RAF.

Evacuation routes

Three routes were allocated to the evacuating vessels. The shortest was Route Z, a distance of 39 nautical miles (72 km), but it entailed hugging the French coast and thus ships using it were subject to bombardment from on-shore batteries, particularly in daylight hours. Route X, although the safest from shore batteries, travelled through a particularly heavily mined portion of the Channel. Ships on this route travelled 55 nautical miles (102 km) north out of Dunkirk, proceeded through the Ruytingen Pass, and headed towards the North Goodwin Lightship before heading south around the Goodwin Sands to Dover. The route was safest from surface attacks, but the nearby minefields and sandbanks meant it could not be used at night. The longest of the three was Route Y, a distance of 87 nautical miles (161 km); using this route increased the sailing time to four hours, double the time required for Route Z. This route followed the French coast as far as Bray-Dunes, then turned north-east until reaching the Kwinte Buoy. Here, after making an approximately 135-degree turn, the ships sailed west to the North Goodwin Lightship and headed south around the Goodwin Sands to Dover. Ships on Route Y were the most likely to be attacked by German surface vessels, submarines, and the Luftwaffe.

You knew this was the chance to get home and you kept praying, please God, let us go, get us out, get us out of this mess back to England. To see that ship that came in to pick me and my brother up, it was a most fantastic sight. We saw dog fights up in the air, hoping nothing would happen to us and we saw one or two terrible sights. Then somebody said, there’s Dover, that was when we saw the White Cliffs, the atmosphere was terrific. From hell to heaven was how the feeling was, you felt like a miracle had happened.

— Harry Garrett, British Army, speaking to Kent Online.

Troops evacuated from Dunkirk on a destroyer about to berth at Dover, 31 May 1940

Picture credited to Puttnam (Mr) and Malindine (Mr), War Office official photographer

Ships

The Royal Navy provided the anti-aircraft cruiser HMS Calcutta, 39 destroyers, and many other craft. The Merchant Navy supplied passenger ferries, hospital ships, and other vessels. Britain’s Belgian, Dutch, Canadian, Polish, and French allies provided vessels as well. Admiral Ramsay arranged for around a thousand copies to be made of the required charts, had buoys laid around the Goodwin Sands and down to Dunkirk, and organised the flow of shipping. Larger ships such as destroyers were able to carry about 900 men per trip. The soldiers mostly travelled on the upper decks for fear of being trapped below if the ship sank. After the loss on 29 May of 19 British and French navy ships plus three of the larger requisitioned vessels, the Admiralty withdrew their eight best destroyers for the future defence of the country.

                           British Ships

Type of vessel                                                             Total engaged – Sunk – Damaged

Cruisers                                                                                  1  > > > >   0 > > > 1

Destroyers                                                                           39 > > > >   6 > > > 19

Sloops, corvettes and gunboats                                    9  > > > >   1  > > >  1

Minesweepers                                                                     36 > > > >  5 > > >  7

Trawlers and drifters                                                     113 > > > > 17  > > > 2

Special service vessels                                                       3 > > > >  1 > > >   0

Ocean boarding vessels                                                     3  > > > > 1 > > >   1

Torpedo boats and anti-submarine boats                13 > > > >  0 > > >  0

Former Dutch schuyts with naval crews                 40  > > > > 4 > > > Unknown

Yachts with naval crews                                                 26  > > > > 3 > > > Unknown

Personnel ships                                                                 45 > > > >  8 > > >  8

Hospital carriers                                                                 8 > > > > 1 > > >   5

Naval motor boats                                                            12  > > >>  6  > > > Unknown

Tugboats                                                                              34 > > > >  3 > > >  Unknown

Other small craft                                                              311 > > >  170 > > >Unknown

Total British ships                                                          693 > > > 226

Does not include ships’ lifeboats and some unrecorded small privately owned craft.

Allied ships

Type of vessel                                                             Total engaged – Sunk – Damaged

Warships (all types)                                                        49 > > > > > 8 > > > > Unknown

Other vessels                                                                    119 > > > > > 9  > > > > Unknown

Total Allied ships                                                            168 > > > >  17 

(Grand total )                                                                 (861) > > > > (243)

Little ships

A wide variety of small vessels from all over the south of England were pressed into service to aid in the Dunkirk evacuation. They included speedboats, Thames vessels, car ferries, pleasure craft, and many other types of small craft. The most useful proved to be the motor lifeboats, which had a reasonably good capacity and speed. Some boats were requisitioned without the owner’s knowledge or consent. Agents of the Ministry of Shipping, accompanied by a naval officer, scoured the Thames for likely vessels, had them checked for seaworthiness, and took them downriver to Sheerness, where naval crews were to be placed aboard. Due to shortages of personnel, many small craft crossed the Channel with civilian crews.

The first of the “little ships” arrived at Dunkirk on 28 May. The wide sand beaches meant that large vessels could not get anywhere near the shore, and even small craft had to stop about 100 yards (91 m) from the waterline and wait for the soldiers to wade out. In many cases, personnel would abandon their boat upon reaching a larger ship, and subsequent evacuees had to wait for boats to drift ashore with the tide before they could make use of them. In most areas on the beaches, soldiers queued up with their units and patiently awaited their turn to leave. But at times, panicky soldiers had to be warned off at gunpoint when they attempted to rush to the boats out of turn. In addition to ferrying out on boats, soldiers at De Panne and Bray-Dunes constructed improvised jetties by driving rows of abandoned vehicles onto the beach at low tide, anchoring them with sandbags, and connecting them with wooden walkways.

Before the operation was completed, the prognosis had been gloomy, with Churchill warning the House of Commons on 28 May to expect “hard and heavy tidings”. Subsequently, Churchill referred to the outcome as a miracle, and the British press presented the evacuation as a “disaster turned to triumph” so successfully that Churchill had to remind the country in a speech to the House of Commons on 4 June that “we must be very careful not to assign to this deliverance the attributes of a victory. Wars are not won by evacuations.” Andrew Roberts comments that the confusion over the Dunkirk evacuation is illustrated by two of the best books on it being called Strange Defeat and Strange Victory.

Troops landed from Dunkirk
              27 May – 4 June

Date          Beaches      Harbour       Total

27 May            7,669                                    7,669

28 May           5,930             11,874         17,804

29 May          13,752            33,558        47,310

30 May          29,512           24,311          53,823

31 May          22,942          45,072         68,014

1 June           17,348           47,081         64,429

2 June           6,695            19,561          26,256

3 June           1,870            24,876         26,746

4 June             622             25,553          26,175

Totals         98,671           239,555       338,226

Three British divisions and a host of logistic and labour troops were cut off to the south of the Somme by the German “race to the sea”. At the end of May, a further two divisions began moving to France with the hope of establishing a Second BEF. The majority of the 51st (Highland) Division was forced to surrender on 12 June, but almost 192,000 Allied personnel, 144,000 of them British, were evacuated through various French ports from 15–25 June under the codename Operation Ariel. The Germans marched into Paris on 14 June and France surrendered eight days later.

The more than 100,000 French troops evacuated from Dunkirk were quickly and efficiently shuttled to camps in various parts of south-western England, where they were temporarily lodged before being repatriated. British ships ferried French troops to Brest, Cherbourg, and other ports in Normandy and Brittany, although only about half of the repatriated troops were redeployed against the Germans before the surrender of France. For many French soldiers, the Dunkirk evacuation represented only a few weeks’ delay before being killed or captured by the German army after their return to France. Of the French soldiers evacuated from France in June 1940, about 3,000 joined Charles de Gaulle’s Free French army in Britain.

In France, the unilateral British decision to evacuate through Dunkirk rather than counter-attack to the south, and the perceived preference of the Royal Navy for evacuating British forces at the expense of the French, led to some bitter resentment. According to Churchill, French Admiral François Darlan originally ordered that the British forces should receive preference, but on 31 May, he intervened at a meeting in Paris to order that the evacuation should proceed on equal terms and that the British would form the rearguard. In fact, the 35,000 men who finally surrendered after covering the final evacuations were mostly French soldiers of 2nd Light Mechanized Division and the 68th Infantry Division. Their resistance allowed the evacuation effort to be extended to 4 June, on which date another 26,175 Frenchmen were transported to England.

The evacuation was presented to the German public as an overwhelming and decisive German victory. On 5 June 1940, Hitler stated “Dunkirk has fallen! 40,000 French and English troops are all that remains of the formerly great armies. Immeasurable quantities of materiel have been captured. The greatest battle in the history of the world has come to an end.” Oberkommando der Wehrmacht (OKW, the German armed forces high command) announced the event as “the greatest annihilation battle of all time”.

Remaining British forces under the Tenth Army as Norman Force, retreated towards Cherbourg.

Casualties

Bourrasque slowly sinking

Isle of Man Steam Packet Company vessel Mona’s Queen shortly after striking a mine on the approach to Dunkirk, 29 May 1940
The BEF lost 68,000 soldiers (dead, wounded, missing, or captured) from 10 May until the armistice with France on 22 June. 3,500 British were killed and 13,053 wounded.[134] All the heavy equipment had to be abandoned. Left behind in France were 2,472 guns, 20,000 motorcycles, and almost 65,000 other vehicles; also abandoned were 416,000 long tons (423,000 t) of stores, more than 75,000 long tons (76,000 t) of ammunition and 162,000 long tons (165,000 t) of fuel. Almost all of the 445 British tanks that had been sent to France with the BEF were abandoned.

Six British and three French destroyers were sunk, along with nine other major vessels. In addition, 19 destroyers were damaged. Over 200 British and Allied sea craft were sunk, with a similar number damaged.[138] The Royal Navy’s most significant losses in the operation were six destroyers:

Grafton, sunk by U-62 on 29 May
Grenade, sunk by air attack at Dunkirk on 29 May
Wakeful, sunk by a torpedo from the E-boat S-30 on 29 May
Basilisk, Havant, and Keith, sunk by air attack off the beaches on 1 June
The French Navy lost three destroyers:

Bourrasque, mined off Nieuport on 30 May
Siroco, sunk by the E-boats S-23 and S-26 on 31 May
Le Foudroyant, sunk by air attack off the beaches on 1 June
The RAF lost 145 aircraft, of which at least 42 were Spitfires, while the Luftwaffe lost 156 aircraft in operations in the nine days of Operation Dynamo, including 35 destroyed by Royal Navy ships (plus 21 damaged) during the six days from 27 May to 1 June.

For every seven soldiers who escaped through Dunkirk, one man was left behind as a prisoner of war. The majority of these prisoners were sent on forced marches into Germany. Prisoners reported brutal treatment by their guards, including beatings, starvation, and murder. Another complaint was that German guards kicked over buckets of water that had been left at the roadside by French civilians for the marching prisoners to drink.

Many of the prisoners were marched to the city of Trier, with the march taking as long as 20 days. Others were marched to the river Scheldt and were sent by barge to the Ruhr. The prisoners were then sent by rail to prisoner of war camps in Germany. The majority (those below the rank of corporal) then worked in German industry and agriculture for the remainder of the war.

Those of the BEF who died or were captured and have no known grave are commemorated on the Dunkirk Memorial.

Dunkirk Jack

The St George’s Cross defaced with the arms of Dunkirk flown from the jack staff is the warranted house flag of the Association of Dunkirk Little Ships. It is known as the Dunkirk Jack. The flag is flown only by civilian vessels that took part in the Dunkirk rescue operation.

Portrayals in literature and popular culture
Books

The novella The Snow Goose: A Story of Dunkirk by Paul Gallico

The novel The Big Pick-Up by Elleston Trevor

The novel Dunkirk co-authored by Lt. Col. Ewan Hunter and Maj. J. S. Bradford

The book The Miracle of Dunkirk by Walter Lord

Movies

The following is the list of the movies dealing with the Dunkirk evacuation or portraying the act of evacuation as the crucial moment of the film’s plot:

Mrs. Miniver (1942), features one of the main leads assisting in the evacuation

Dunkirk (1958), follows a corporal leading his left-behind men to Dunkirk, and two civilians who participate in the evacuation

Weekend at Dunkirk (1964), follows a French soldier attempting to escape with the retreating British

Atonement (2007), the main character waits to be evacuated at the Dunkirk beach

Their Finest (2016), follows a British Ministry of Information film team making a morale-boosting film about the evacuation

Dunkirk (2017), focusing on a private attempting to retreat from Dunkirk, civilians who participate in the evacuation, and the RAF’s contribution to the evacuation

Darkest Hour (2017), depicts the evacuation from the perspective of Winston Churchill and the generals in war rooms

TV documentaries

Dunkirk (2004 BBC television docudrama), depicts the evacuation, portraying the main incidents and players in a documentary-style fashion

Other

It is simulated in the board wargame Dunkirk: The Battle of France. The battle has been the subject of video games including Blazing Angels: Squadrons of WWII, and Secret Weapons Over Normandy.

The evacuation is the subject of the song “The Fires of Calais,” telling the story from the perspective of a British fisherman taking part in the rescue. The song was released on the album Then Again.

1940 Dunkirk Veterans’ Association

Dunkirk Medal

Sourced from Wikipedia

Sharpes Reunion interview (Part Two)

 Articles  Comments Off on Sharpes Reunion interview (Part Two)
May 242020
 

The Podcast interview is at the base of this page (Enjoy)

Jason Salkey and Sean Bean 

We are very lucky to be able to share with you the recent recording which is now available for you to hear.

This was recorded by History hack as a Podcast, keeping everyone safe whilst on the 2020 lockdown.

No members of this Podcast were put at risk during this recording, all those present recorded from their own comfort of their own homes.

Joining the podcast was our own Rifleman Harris, he’s the educated one and his boss who rose up through the ranks none other than Major Sharpe.

So in this podcast you will hear the tones of Sheffield born Sean Bean and Londoner Jason Salkey.

Sean or (Beanie) to his friends was not the first choice to play Sharpe. In this informal friendly chat called this, because of the warmth of the interviewers and the comradeship, banter exchanged throughout between the two from the 95th the behind the scenes reality unfolds.

Along with Napoleonic historian Zak White, this is a rich tapestry of fact (history) and fiction (the series)which portrays Bernard Cornwell`s book series Sharpe.

One can not help but smile whilst listening to the Actors, and gasp at the revelations of history.

Some of the history revelations do not sit right, although correct, those who succeeded the Ancestral Regiments some 150 years on, might not agree with Mr White, due to the Battle honours worn on the Regimental Cap badge of The Royal Green Jackets, earned by some of the 95th.

This some would say is “Sharpes` honour.”

The Regiments` that succeeded The Royal Green Jackets and amalgamated into one successor Regiment, have gone full circle and are now known as, The Rifles, thus meaning history has gone full circle, “Once a Rifleman always a Rifleman,” fixed swords at the ready, we will leave you with Major Sharpe and Rifleman Harris for the reunion, which was Sharpe to unfold, as there is a story to unfold.

Mr White has really taken the hot seat, is he now Napoleon and are these two from the 95th about to have their Waterloo?

Enjoy everyone, whilst listening to the truthful, frank stories, unfold a story to be retold.

This truly is Sharpes’ Gold.

Author Julie Ann Rosser

Defence of Calais

 Articles  Comments Off on Defence of Calais
May 242020
 

Green Jackets Memorial Calais

The Siege of Calais (1940) was a battle for the port of Calais during the Battle of France in 1940. The siege was fought at the same time as the Battle of Boulogne, just before Operation Dynamo, the evacuation of the British Expeditionary Force (BEF) through Dunkirk. After the Franco-British counter-attack at the Battle of Arras (21 May), German units were held back to be ready to resist a resumption of the counter-attack on 22 May, despite the protests of General Heinz Guderian, the commander of the XIX Armee Korps, who wanted to rush north up the Channel coast to capture Boulogne, Calais and Dunkirk. An attack by part of the XIX Armee Korps was not authorised until 12:40 a.m. on the night of 21/22 May.

By the time that the 10th Panzer Division was ready to attack Calais, the British 30th Infantry Brigade and 3rd Royal Tank Regiment (3rd RTR) had reinforced the French and British troops in the port. On 22 May, the British troops had established roadblocks outside the town and French rearguards skirmished with German armoured units, as they advanced towards Calais. British tanks and infantry had been ordered south to reinforce Boulogne but were too late. They then received orders to escort a food convoy to Dunkirk but found the road blocked by German troops. On 23 May, the British began to retire to the old Calais walls (built in the 1670s) and on 24 May, the siege began. The attacks by the 10th Panzer Division were mostly costly failures and by evening, the Germans reported that about half their tanks had been knocked out and a third of the infantry were casualties. The German attacks were supported by the Luftwaffe, while the Allied defenders were supported by their navies delivering supplies, evacuating wounded and bombarding German targets around the port.

On the night of 24/25 May, the defenders were forced to withdraw from the southern enceinte, to a line covering the Old Town and Citadel; attacks next day against this shorter line were repulsed. The Germans tried several times to persuade the garrison to surrender but orders had been received from London to hold out, because an evacuation had been forbidden by the French commander of the northern ports. More German attacks early on 26 May failed and the German commander was given an ultimatum that if Calais was not captured by 2:00 p.m., the attackers would be pulled back and the town levelled by the Luftwaffe. The Anglo-French defences began to collapse in the early afternoon and at 4:00 p.m. the order “every man for himself” was given to the defenders, as Le Tellier, the French commander surrendered. Next day, small naval craft entered the harbour and lifted about 400 men, while aircraft of the RAF and Fleet Air Arm dropped supplies and attacked German artillery emplacements.

In 1949, Churchill wrote that the defence of Calais delayed the German attack on Dunkirk, helping to save the 300,000 soldiers of the BEF, a claim that Guderian contradicted in 1951. In 1966, Lionel Ellis, the British official historian, wrote that three panzer divisions had been diverted by the defence of Boulogne and Calais, giving the Allies time to rush troops to close a gap west of Dunkirk. In 2006, Karl-Heinz Frieser wrote that the halt order issued to the German unit commanders because of the Anglo-French attack at the Battle of Arras (21 May) had a greater effect than the siege. Hitler and the higher German commanders panicked because of their fears of flank attacks, when the real danger was of the Allies retreating to the coast before they could be cut off. Reinforcements sent from Britain to Boulogne and Calais arrived in time to forestall the Germans and hold them off when they advanced again on 22 May.

The term Channel Ports refers to Calais, Boulogne and Dunkirk (and sometimes Ostend in Belgium). The ports are the nearest to Cap Gris Nez, the shortest crossing from England and are the most popular for passenger traffic. Calais is built on low ground with low sand dunes on either side and is enclosed by fortifications. There was a citadel in the old town surrounded by water and in 1940 on the east side, the moat was still wet but elsewhere had become a dry ditch. Surrounding the town was an enceinte, a defensive fortification, which originally consisted of twelve bastions linked by a curtain wall, with a perimeter of 8 mi (13 km), built by Vauban from 1667 to 1707.

In many places, the enceinte was overlooked by suburban buildings built in the nineteenth century. Two of the southern bastions and the wall linking them had been demolished to make way for railway lines, leading to railway sidings and quays of the Gare Maritime in the harbour. About 0.99 miles (1.6 km) outside the enceinte to the west was Fort Nieulay. Two other forts to the south and east were derelict or had disappeared. Outside the town, low ground to the east and south is cut by ditches, which limit the landward approach to roads raised above ground level. To the west and south-west, there is a ridge of higher ground between Calais and Boulogne, from which Calais is overlooked.

BEF

When plans for the deployment of the British Expeditionary Force (BEF) were made, the British Imperial General Staff drew from experience in the First World War. The British Expeditionary Force had used the Channel Ports as their entrepôts for supplies, even though they were only 32 km (20 mi) from the Western Front. Had the German Spring Offensive of 1918 succeeded in breaking through the front and capturing or even threatening the ports, the BEF would have been in a desperate position. During the Phoney War (September 1939 – 10 May 1940), the BEF had been supplied through ports further to the west, such as Le Havre and Cherbourg but the Channel Ports came into use, once mine barrages had been laid in the English Channel in late 1939, to reduce the demand for ships and escorts. When leave from the BEF began in December, Calais was used for communication and for troop movements, especially for men granted compassionate leave.

The Battle of France

On 10 May 1940, the Germans began Fall Gelb an offensive against France, Belgium and the Netherlands. Within a few days, Army Group A (Generaloberst Gerd von Rundstedt) broke through the French Ninth Army (General André Corap) in the centre of the French front near Sedan and drove westwards down the Somme river valley, led by Panzergruppe Kleist comprising XIX Armee Korps under Generalleutnant Heinz Guderian and the XLI Armee Korps (Generalleutnant Georg-Hans Reinhardt). On 20 May, the Germans captured Abbeville at the mouth of the Somme River, cutting off the Allied troops in Northern France and Belgium. The Battle of Arras, a Franco-British counter-attack on 21 May, led the Germans to continue to attack north towards the channel ports, rather than advance southwards over the Somme. Apprehension about another Franco-British counter-attack led to the “Arras halt order” being issued by the German higher commanders on 21 May. The neighbouring XV Korps (General Hermann Hoth) was held back in reserve and a division of the XLI Korps was moved eastwards, when the corps was only 31 miles (50 km) from Dunkirk.

Late on 21 May, Oberkommando des Heeres (OKH) rescinded the halt order; Panzergruppe Kleist was to resume the advance and move about 50 mi (80 km) north, to capture Boulogne and Calais. The next day, Guderian gave orders for the 2nd Panzer Division (Generalleutnant Rudolf Veiel) to advance to Boulogne on a line from Baincthun to Samer, with the 1st Panzer Division (Generallautnant Friedrich Kirchner) as a flank guard on the right, advancing to Desvres and Marquise in case of a counter-attack from Calais; the 1st Panzer Division reaching the vicinity of the port during the late afternoon. The 10th Panzer Division (Generalleutnant Ferdinand Schaal) was detached to guard against a possible counter-attack from the south. Parts of the 1st Panzer Division and 2nd Panzer Division were also held back to defend bridgeheads on the south bank of the Somme.

Allied defensive preparations

Calais had been raided by Luftwaffe bombers several times, which caused disruption to military movements, confusion and traffic jams, with refugees making for Calais meeting refugees fleeing the port. The French army units in Calais were commanded by Commandant (Major) Raymond Le Tellier and the northernmost bastions and fortifications were manned by French naval reservists and volunteers commanded by the Commandant du Front de Mer (Capitaine de frégate Charles de Lambertye). Various army stragglers, including infantry and a machine-gun company had arrived in the town.[11] On 19 May, Lieutenant-General Douglas Brownrigg, the Adjutant General of the BEF, appointed Colonel Rupert Holland to command the British troops in Calais and to arrange the evacuation of non-combatant personnel and wounded. The British contingent consisted of a platoon of the Argyll and Sutherland Highlanders (A&SH) who were guarding a radar site, the 2nd Anti-Aircraft Regiment RA, 58th (A&SH) Light Anti-Aircraft Regiment RA and the 1st Searchlight Regiment RA.

When the Germans captured Abbeville on 20 May, the War Office in Britain ordered troops to be despatched to the Channel Ports as a precaution. The 20th Guards Brigade was sent to Boulogne. The 3rd Royal Tank Regiment (3rd RTR, Lieutenant-Colonel R. Keller), the 1st Battalion Queen Victoria’s Rifles (QVR, Lieutenant-Colonel J. A. M. Ellison-Macartney), the 229th Anti-Tank Battery RA and the new 30th Motor Brigade (Brigadier Claude Nicholson), were ordered to Calais. Most of the units dispatched to Calais were unprepared for action in some respects. The 3rd RTR was part of the 1st Heavy Armoured Brigade (Brigadier John Crocker) and had been about to leave for Cherbourg, to join the British 1st Armoured Division, which was assembling at Pacy-sur-Eure in Normandy. The QVR were a Territorial Army motor-cycle battalion, nominally the divisional cavalry for the 56th (London) Division. They had briefly been attached to the 30th Motor Brigade in April but then were returned to the 56th (London) Division for Home Defence, being deprived of their twenty-two scout cars. The 30th Motor Brigade had been formed on 24 April 1940, from the 1st Support Group, to take part in the Norwegian Campaign. After these orders were cancelled, the brigade was posted to East Anglia to meet a supposed threat of invasion. The main body of the brigade were the 1st Battalion, the Rifle Brigade (1st RB, Lieutenant Colonel Chandos Hoskyns) and the 2nd Battalion, King’s Royal Rifle Corps (2nd KRRC, Lieutenant Colonel Euan Miller); these were both highly trained units, each about 750 strong.

Late on 21 May, the QVR were ordered to proceed by train to Dover to embark for France. All the motor-cycle combinations and other vehicles were to be left behind. After a confused move it was realised that there had been a staff error and that there was room for the motor-cycle combinations aboard the TSS Canterbury but they did not arrive before the ship sailed. Lieutenant-Colonel Keller received orders on the night of 21/22 May at Fordingbridge to move the 3rd RTR to Southampton but during the journey the personnel train was diverted to Dover, while the vehicles continued to Southampton as planned. Keller was briefed at Dover to go to Calais and given sealed orders for the British port commander. The ships carrying the personnel of the 3rd RTR and the QVR departed Dover at 11:00 a.m. They arrived at Calais around 1:00 p.m., under a pall of smoke from buildings on fire in the town. The QVR landed without their motorcycles, transport or 3-inch mortars and only smoke bombs for the 2-inch mortars. Many of the men were armed only with revolvers and had to scavenge for rifles from those dumped on the quay by personnel hastily departing for England. The 229th Anti-Tank Battery RA also arrived but in the haste to move, four of the twelve anti-tank guns had to be left behind.

While they waited for their vehicles to arrive, the men of the 3rd RTR were ordered to disperse in the sand dunes and were bombed soon after. Keller met Holland who told him to take orders from the BEF GHQ but at 5:00 p.m., Brownrigg arrived in Calais and ordered Keller to move the 3rd RTR south-west as soon as it had unloaded, to join the 20th Guards Brigade at Boulogne. After Brownrigg left, Major Ken Bailey turned up from GHQ with orders for the 3rd RTR to go to St. Omer and Hazebrouck, 29 mi (47 km) east of Boulogne, to make contact with GHQ. Brownrigg had gone to Dover, unaware that his orders at Calais had been superseded. He met Nicholson and briefed him to relieve Boulogne with the 30th Infantry Brigade and the 3rd RTR.

The ship with the 3rd RTR tanks arrived from Southampton at 4:00 p.m. but unloading was very slow, as 7,000 imp gal (32,000 l) of petrol had been loaded on deck and had to be moved using only the ship’s derricks, as a power cut had immobilised the cranes on the docks. A power cut and a strike by the ship’s crew for ​4 1⁄2 hours during the night of 22/23 May, added to the delay and the captain had intended to leave the harbour without waiting, until he was held up at gunpoint by a 3rd RTR officer. The dock workers were exhausted, having been at work unloading rations for the BEF for many hours and it was not until the following morning that the vehicles had been unloaded and refuelled. The cruiser tanks had been loaded first and had to be unloaded after everything else. More delay was caused by the tank guns having been coated in a preservative and loaded separately. The guns had to be cleaned off,before they could be remounted.

22 May

The 3rd RTR had been assembling its 21 Light Tank Mk VI and 27 cruiser tanks at Coquelles on the Calais–Boulogne road according to the orders received from Brownrigg and a patrol of light tanks was sent down the St. Omer road according to the orders received from GHQ via Bailey. The patrol found the town empty, under bombardment and illuminated by the fires of burning buildings, at which the patrol returned to Coquelles at about 8:00 a.m. in the morning of 23 May. (The patrol was fortunate to miss the 6th Panzer Division, which had laagered around Guînes, west of the St. Omer road for the night.)

Calais was within the range of RAF aircraft based in Britain and at 6:00 a.m., Hawker Hurricanes of 151 Squadron shot down a Junkers Ju 88 bomber between Calais and Boulogne and Spitfires of 74 Squadron shot down another Ju 88, both from Lehrgeschwader 1 (LG 1). Fighters from 54 Squadron and 92 Squadron claimed five Messerschmitt Bf 109s of Jagdgeschwader 27 (JG 27, Fighter Wing 27) for one Spitfire during the morning and in the afternoon, 92 Squadron lost two Spitfires shot down to Messerschmitt Bf 110s of Zerstörergeschwader 26 (ZG 26) and Zerstörergeschwader 76 (ZG 76).[25] From 21–22 May, LG 1 lost five aircraft over the Channel ports before II./Jagdgeschwader 2 was assigned to the group as escorts while JG 27 lost 10 Bf 109s. Six British fighters were lost. Sturzkampfgeschwader 77 (StG 77, Dive Bomber Wing 77) lost five on this date. No. 2 Group RAF flew support sorties in the area from 21 to 25 May, losing 13 bombers.

The German advance resumed in the morning and at 8:00 a.m. the panzers crossed the Authie. During the afternoon, French rearguards, with some parties of British and Belgian troops, were met at Desvres, Samer and the vicinity of Boulogne. The Allied air forces were active and made bombing and strafing attacks on the German forces, with little opposition from the Luftwaffe. The 10th Panzer Division was released from its defensive role and Guderian ordered the 1st Panzer Division, which was near Calais, to turn east towards Dunkirk and the 10th Panzer Division to move from Doullens to Samer and thence to Calais. The 1st Panzer Division was to advance eastwards to Gravelines at 10:00 a.m. the next day. The 10th Panzer Division advance was delayed around Amiens, because infantry units which were to relieve the division in the bridgehead on the south bank of the Somme, arrived late and the British reinforcements sent to Calais forestalled the Germans.

23 May

On 23 May, the threat to the German flanks at Cambrai and Arras had been contained and Fliegerkorps VIII (Generaloberst Wolfram Freiherr von Richthofen) became available to support the 10th Panzer Division at Calais. Most of the Junkers Ju 87 Stuka dive-bombers were based around Saint Quentin, after leap-frogging forward in the wake of the advance but Calais was at the limit of their range. As units moved forward they had also come within the range of Fighter Command aircraft in England and Richthofen assigned I JG 27 (I Wing, Fighter Group 27) to Saint-Omer for fighter cover. Among the Geschwader (groups) flying in support of the 10th Panzer Division were StG 77, StG 1 (Oberstleutnant [Lieutenant-Colonel] Eberhard Baier), StG 2 (Geschwaderkommodore [Group Commander] Oskar Dinort) and the medium bombers of Kampfgeschwader 77 (KG 77, Oberst [Colonel] Dr. Johan-Volkmar Fisser).

The Luftwaffe units engaged RAF fighters and 92 Squadron shot down four Bf 109s; three I JG 27 pilots were taken prisoner, one was killed in action and 92 Squadron lost three Spitfires with their pilots. To reinforce the German fighters, I Jagdgeschwader 1, which was also based nearby to the south, was called on to escort Ju 87 units attacking Calais. Flying from forward airfields at Monchy-Breton, Hauptmann (Captain) Wilhelm Balthasar led JG 1 against the British Spitfires and claimed two of the four from his unit but lost one pilot killed.

The 3rd RTR received the report of the reconnaissance patrol and Bailey went back to GHQ with a light tank escort. Bailey became separated from the escort, ran into the advanced guard of the 1st Panzer Division at a crossroads on the St. Omer road and the driver was killed. The Germans were driven off by the men of a Royal Army Service Corps (RASC) petrol convoy, which had arrived on the scene. Bailey and the wounded passenger returned to Calais at about noon and told Keller that another attempt should be made, since the Germans had retired. Keller had already received information from the French that German tanks were moving towards Calais from Marquise. Despite doubts, Keller sent the rest of the 3rd RTR to follow the light tanks from Coquelles towards St. Omer at 2:15 p.m. When about 1 mi (2 km) south-east of Hames-Bources, the rearguard tanks and anti-tank guns of the 1st Panzer Division were spotted on the Pihen-les-Guînes road (guarding the rear of the division as the main body moved north-east towards Gravelines).

The 3rd RTR drove back German light tanks on the St. Omer road, but despite losses, the heavier German tanks and anti-tank gun screen knocked out from 7–12 British tanks, before Nicholson ordered the 3rd RTR back to Calais. Other units of the 1st Panzer Division moving on Gravelines met about fifty men of C Troop, 1st Searchlight Regiment at Les Attaques, about 3 mi (5 km) south-east of Bastion 6 in the Calais enceinte. C Troop had built a roadblock with a bus and a lorry, covered by Bren guns, rifles, and Boys anti-tank rifles and held out for about three hours before being overrun. German tank and infantry parties then attacked a post at Le Colombier 1 mi (1.6 km) further along the St.Omer–Calais road but were caught in crossfire from other posts and the guns of the 58th Light Anti-Aircraft Regiment on high ground near Boulogne. The Germans were repulsed until the post was withdrawn at 7:00 p.m. Calais was not the objective of the 1st Panzer Division but Oberst Kruger, commanding the battlegroup which was engaged at Guînes, Les Attaques and Le Colombier, had orders to take Calais from the south-east, if this could be achieved by a coup de main. As night fell the division reported that Calais was strongly held and broke off its attacks to resume the advance on Gravelines and Dunkirk.

Earlier, at 4:00 p.m. Schaal had ordered the main body of his 10th Panzer Division, consisting of the 90th Panzer Regiment (two tank battalions) and 86th Rifle Regiment (two infantry battalions) supported by a battalion of medium artillery, to advance up the main road from Marquise to the high ground around Coquelles, which would give them good observation over Calais. Meanwhile, on the right flank, a battlegroup based on the division’s 69th Rifle Regiment (two infantry battalions) was to advance from Guînes to the centre of Calais.

When Nicholson had arrived in Calais in the afternoon with the 30th Infantry Brigade, he had discovered that the 3rd RTR had already been in action and had considerable losses, and that the Germans were closing on the port and had cut the routes to the south-east and south-west. Nicholson ordered the 1st RB to hold the outer ramparts on the east side of Calais and the 2nd KRRC to garrison the west side, behind the outposts of the QVR and the anti-aircraft units outside the town, which began a retirement to the enceinte from about 3:00 p.m. and continued during the night. Just after 4:00 p.m. Nicholson received an order from the War Office to escort a truck convoy carrying 350,000 rations to Dunkirk to the north-east, which was to supersede any other orders. Nicholson moved some troops from the defence perimeter to guard the Dunkirk road, while the convoy assembled but the 10th Panzer Division arrived from the south and began to bombard Calais from the high ground.

At 11:00 p.m. the 3rd RTR sent a patrol of a Cruiser Mk III (A13) and three light tanks to reconnoitre the convoy route, which ran into the 1st Panzer Division roadblocks covering the road to Gravelines. The tanks drove through the first barricade, then found lots of Germans beyond the third road block, who mistook the tanks for German, even when one of the tank commanders asked if they “Parlez-vous Anglais?” The British tanks drove on for about 2 mi (3.2 km), were inspected by torchlight and then stopped at a bridge over the Marck, to clear a string of mines which had been laid across the road. Two mines were blown up by 2-pounder fire and the rest dragged clear, the tanks then becoming fouled by coils of anti-tank wire, which took twenty minutes to cut free. The tanks then drove on and reached the British garrison at Gravelines but the radio in the A13 failed to transmit properly and Keller received only garbled fragments of messages, suggesting that the road was clear.  A force of five tanks and a composite company of the Rifle Brigade led the truck convoy at 4:00 a.m. Near Marck, about 3 mi (4.8 km) east of Calais, they encountered a German road block which they outflanked but at daylight it was clear they would soon be surrounded and they withdrew to Calais.

24 May

At 4:45 a.m. the French coastal guns opened fire and German artillery and mortar fire began falling on the port at dawn, particularly on French gun positions, preparatory to an attack by the 10th Panzer Division against the west and south-west parts of the perimeter. The retirement of the QVR, searchlight and anti-aircraft troops from the outlying roadblocks had continued overnight until about 8:30 a.m., when the troops completed their withdrawal to the enceinte. Further west, B Company of the QVR was ordered back from Sangatte, about 5 mi (8.0 km) west of Calais at 10:00 a.m. and had retired slowly to the western face of the enceinte by 10:00 p.m. and a C Company platoon out on a road east of Calais, also stayed out until 10:00 p.m. but before midday, the main defensive line had been established on the enceinte. The first German attacks were repulsed except in the south, where the attackers penetrated the defences until forced back by a hasty counter-attack by the 2nd KRRC and tanks of the 3rd RTR. The German bombardment was extended to the harbour, where there was a hospital train full of wounded waiting to be evacuated. The harbour control staff ordered the wounded to be put aboard the ships, which were still being unloaded of equipment for the infantry battalions and rear echelon of the tank regiment. The dock workers and rear-area troops were also embarked and the ships returned to England, with some of the equipment still on board.

Panzer

During the afternoon the Germans attacked again on all three sides of the perimeter, with infantry supported by tanks. The French garrison of Fort Nieulay, outside the western ramparts surrendered after a bombardment. French marines in Fort Lapin and the coastal artillery emplacements spiked the guns and retreated. On the southern perimeter the Germans broke in again and could not be forced back, the defence being hampered by fifth columnists sniping from the town. The German troops who broke in began to fire in enfilade on the defenders from the houses they had captured. The defenders on the ramparts ran short of ammunition and the 229th Battery was reduced to two operational anti-tank guns. The Germans had great difficulty in identifying British defensive positions and by 4:00 a.m., had managed only a short advance. At 7:00 p.m. the 10th Panzer Division reported that a third of the equipment, vehicles and men were casualties, along with half of the tanks.

The Royal Navy had continued to deliver stores and take off wounded. The destroyers HMS Grafton, HMS Greyhound, HMS Wessex, HMS Wolfhound, HMS Verity and the Polish Okręt Rzeczypospolitej Polskiej (ORP) Burza bombarded shore targets. The Ju 87 Stuka units made a maximum effort during the day, Wessex was sunk and Burza was damaged by StG 2 and StG 77 during a raid at 4:42 p.m. StG 2 were ordered to target shipping. Dinort attacked Wessex but the destroyer made an elusive target and he missed after bombing on the second dive; the other two groups made a forty-strong formation which hit Wessex several times. The German crews had little training on anti-shipping operations but in the absence of British fighters, dived from 12,000 feet (3,700 m); as the Stukas departed they were attacked by Spitfires of 54 Squadron which shot down three of the dive-bombers and lost three Spitfires to the Bf 109 escorts.

Wolfhound put into Calais and the captain reported to the Admiralty that the Germans were in the southern part of town and that the situation was desperate. Nicholson had received a message from the War Office at 3:00 a.m. that Calais was to be evacuated and that once unloading was complete, non-combatants were to be embarked; at 6:00 p.m. Nicholson was told that the fighting troops would have to wait until 25 May. Lacking a reserve to counter-attack at the perimeter, Nicholson ordered a retirement to the Marck canal and Avenue Léon Gambetta and during the night, the defenders retreated to the Old Town and the area to the east, inside the outer ramparts and the Marck and Calais canals, while holding the north–south parts of the enceinte, on both sides of the port. Le Tellier had set up the French headquarters in the Citadel on the west side of the Old Town but command of the French forces remained divided, with Lambertye still in charge of the naval artillery.

It had been arranged that French engineers would prepare the bridges over the canals for demolition but this had not occurred and the British had no explosives to do it themselves. Nicholson was informed by a signal at 11.23 p.m. from General Edmund Ironside the Chief of the Imperial General Staff (CIGS) that General Robert Fagalde, the French commander of the Channel Ports since 23 May, had forbidden an evacuation and that the Calais defenders must comply. As the harbour had lost its significance, Nicholson was to choose the best position from which to fight on; ammunition would be sent but no reinforcements. Nicholson was told that the 48th Division (Major-General Andrew Thorne) had begun to advance towards Calais to relieve the defenders. From 10:30–11:30 p.m. the French naval gunners spiked most of their guns and made their way to the docks to embark on French ships. Lambertye refused to go, despite being ill, and asked for volunteers from the 1,500 navy and army personnel to stay behind, about fifty men responding despite being warned that there would be no more rescue attempts. The volunteers took over Bastion 11 on the west side and held it for the duration of the siege.

25 May

During the night, Vice-Admiral James Somerville crossed from England and met Nicholson, who said that with more guns he could hold on for a while longer and they agreed that the ships in the port should return. At dawn on 25 May, the German bombardment resumed, concentrating on the old town, where buildings fell into streets, high winds fanned fires everywhere and smoke from explosions and the fires blocked the view. The last guns of the 229th Anti-Tank Battery were knocked out and only three tanks of the 3rd RTR remained operational. Distribution of rations and ammunition was difficult and after the water mains were broken, derelict wells were the only source. At 9:00 a.m. Schaal sent the mayor, André Gerschell, to ask Nicholson to surrender who refused. At noon, Schaal offered another opportunity to surrender and extended the 1:00 p.m. deadline to 3:30 p.m., when he found that his emissaries had been delayed, only to be refused again. The German bombardment increased during the day, despite attempts by Allied ships to bombard German gun emplacements.

Wrecked vehicles at Calais railway station.

In the east, the 1st Rifle Brigade and parties of the QVR on the outer ramparts and the Marck and Calais canals repulsed a determined attack. The French then eavesdropped on a German wireless message, which disclosed that the Germans were going to attack the perimeter on the west side, held by the 2nd KRRC. At 1:00 p.m., Nicholson ordered a counter-attack and eleven Bren carriers and two tanks with the 1st RB were withdrawn and assembled for a sortie. The attackers were to depart from the enceinte north of the Bassin des Chasses de l’Ouest and rush round to the south to get behind the Germans. Hoskyns, the 1st RB commander objected, since the plan required the withdrawal of tanks and men from where the Germans were close to breaking through. Hoskyns was over-ruled and it took too long to contact Nicholson, because telephone and radio communication had been lost. The attack went ahead but the carriers bogged in the sand and the attempt failed. At about 3:30 p.m., the units holding the Canal de Marck were overwhelmed and Hoskyns was mortally wounded by a mortar bomb. Major A. W. Allan, the second-in-command of 1st RB, took over the battalion which then made a fighting withdrawal northwards through the streets, to the Bassin des Chasses, the Gare Maritime and the quays. In the south-east corner, at the 1st RB positions near the Quai de la Loire, a rearguard was surrounded and a counter-attack to extricate them was repulsed. Some of the rearguard broke out in a van driven by a fifth columnist at gunpoint but he stopped before reaching safety and few of the wounded reached cover. Only 30 men of the 150 in the area escaped.

Damage inflicted on Calais by German artillery.

The units of the RB and QVR withdrawing from the northern part of the enceinte gained a respite when German artillery mistakenly shelled their own troops (II Battalion, Rifle Regiment 69) who were forming up in a small wood to the east of Bastion No. 2. In the afternoon, a German officer with a captured French officer and Belgian soldier, approached under a flag of truce to demand a surrender, which Nicholson refused. The German attack was resumed and continued until the German commander decided that the defenders could not be defeated before dark. In the old town the KRRC and more parties of the QVR fought to defend the three bridges into the Old Town from the south but at 6:00 p.m. the German artillery ceased fire and tanks attacked the bridges. Three panzers attacked Pont Faidherbe and two were knocked out, the third tank retiring. At Pont Richelieu, the middle bridge, the first tank drove over a mine and the attack failed. At Pont Freycinet, near the Citadel, the attempt succeeded and the bridge was captured by tanks and infantry, who took cover in houses north of the bridge, until counter-attacked by the 2nd KRRC. Parties of French and British troops held a bastion, the French in the Citadel lost many men repulsing the attacks and Nicholson established a joint headquarters with the French.

Shortly after Hoskyns (commanding the 1st RB) was mortally wounded, Lieutenant Colonel Keller, commanding the 3rd RTR, decided that his few remaining tanks under shellfire near the Bastion de l’Estran, could no longer play a useful part in the defence. He ordered them to withdraw eastwards through the sand dunes north of the Bassin des Chasses while he himself tried to evacuate 100 wounded men from Bastion No. 1 to the sand dunes; the wounded were captured a short time later. Riding on a light tank, Keller later reached C Company of the 1st RB north-east of the bassin, where he suggested that they and his tanks withdraw to Dunkirk but his last tanks broke down or ran out of fuel and were destroyed by their crews. At nightfall Keller and some of the crews made their way on foot to Gavelines. Keller and one of his squadron commanders were able to cross the Aa River; next morning they contacted French troops and were later evacuated to Dover.

At 10:30 a.m. GMT, 17 Squadron claimed three Stukas destroyed over Calais and three damaged, plus a Do 17. Air cover was maintained by 605 Squadron, which claimed four Ju 87s and a Hs 126 destroyed with another five unconfirmed claims, after an engagement at 5:54 p.m. while escorting Bristol Blenheim on a reconnaissance sortie. The formation of 40 to 50 Stukas attacked shipping near the port. 264 Squadron flew escort operations in the afternoon without incident. On 25 May, 11 Group flew 25 Blenheim bomber and 151 fighter sorties, losing two Blenheims and two fighters, against 25 Luftwaffe aircraft shot down and nine damaged to all causes. RAF Bomber Command flew 139 sorties against land targets on 25 May. StG 2 lost four Ju 87s and one damaged. All eight of the crews shot down were captured but released after the French surrender.

26 May

German soldier amidst the ruins of Calais.

In case Fagalde relented, fifteen small naval vessels towing boats, with room for about 1,800 men waited offshore, some sailed into Calais harbour without an evacuation order and one vessel delivered another order for Nicholson to continue the battle. At 8:00 a.m. Nicholson reported to England that the men were exhausted, the last tanks had been knocked out, water was short and reinforcement probably futile, the Germans had got into the north end of town. The resistance of the Calais garrison had led the German staff to meet late on 25 May, when Colonel Walther Nehring, the XIX Armee Korps Chief of Staff, suggested to Schaal that the final attack should be postponed until 27 May, when more Stukas would be available. Schaal preferred to attack, rather than give the British time to send reinforcements.

At 5:00 a.m., the German artillery resumed its bombardment. Several artillery units had been brought up from Boulogne, doubling the numbers of guns available to Schaal. From 8:30–9:00 a.m., the old town and citadel were attacked by artillery and up to 100 Stukas, after which the infantry attacked, while the German guns and StG 77 and StG 2 subjected the Citadel to heavy assaults for another thirty minutes. The 2nd KRRC continued to resist the German infantry attacks at the canal bridges. Schaal was told that if the port had not been surrendered by 2:00 p.m., the division would be ordered back until the Luftwaffe had levelled the town. The Germans began to break through around 1:30 p.m., when Bastion 11 was captured after the French volunteers ran out of ammunition. On the other side of the harbour, the 1st RB held positions around the Gare Maritime, under attack from the south and east. Major Allan, in command, held on in the belief that the 2nd KRRC might withdraw north-east to the Place de Europe to make a joint final defence of the harbour. At 2:30 p.m. the Germans finally overran the Gare Maritime and the Bastion de l’Estran. The survivors of the 1st RB made a last stand on and around Bastion No. 1, before being overwhelmed at 3:30 p.m.

A church and houses in Calais, demolished by Stukas.

The 2nd KRRC retreated from the three bridges between the old and new towns, to a line from the harbour to the cathedral between Rue Notre Dame and Rue Maréchaux, 600 yd (549 m) from one of the bridges. Troops in the Citadel began to show white flags. German tanks crossed Pont Freycinet and British troops dispersed, having no weapons to engage tanks. At 4:00 p.m. the new line collapsed and the 2nd KRRC was given the order “every man for himself”, after which only B Company fought as a unit, not having received orders to retreat to the harbour. The occupants of the Citadel realised that the German artillery had ceased fire and found themselves surrounded around 3:00 p.m.; a French officer arrived, with news that Le Tellier had surrendered.

During the day, the RAF flew 200 sorties near Calais, with six fighter losses from 17 Squadron, which attacked Stuka dive-bombers of StG 2, claimed three, a Dornier Do 17 and a Henschel Hs 126. Fleet Air Arm (FAA) Fairey Swordfish aircraft, bombed German troops near Calais and the escorts from 54 Squadron claimed three Bf 110s and a Bf 109, for the loss of three aircraft. At noon 605 Squadron claimed four Stukas from StG 77 and a Hs 126 for a loss of a Hurricane. JG 2 protected the Ju 87s, fought off the attacks from 17 Squadron and there appear to have been no German losses, while they shot down Blenheim on a reconnaissance sortie. I Jagdgeschwader 3 were able to conduct fighter sweeps over Calais after noon, with the battle almost over. Seven Bf 109s engaged a flight of Hurricanes, the dogfight extending over Calais; one Hurricane was shot down for no loss to JG 3.

Aftermath
Analysis

A damaged Cruiser Mk I CS abandoned in Calais, 1940.

In 2006, Sebag-Montefiore wrote that the defence of the advanced posts outside Calais, by inexperienced British troops against larger numbers of German troops, may have deterred the 1st Panzer Division commanders from probing the Calais defences further and capturing the port. In the early afternoon of 23 May, it was unlikely that the British troops on the Calais enceinte were prepared to receive an attack, the 2nd KRRC and 1st RB having disembarked only an hour earlier at 1:00 p.m. The unloading of the 2nd KRRC vehicles was delayed until 5:00 p.m. and half of the battalion did not arrive at its positions until 6–6:30 p.m. An attack on Calais in the early afternoon would only have met the QVR.

The day after Calais surrendered, the first British personnel were evacuated from Dunkirk. In Erinnerungen eines Soldaten (1950, English edition 1952), Guderian replied to a passage in Their Finest Hour (1949) by Winston Churchill, that Hitler had ordered the panzers to stop outside Dunkirk in the hope that the British would make peace overtures. Guderian denied this and wrote that the defence of Calais was heroic but made no difference to the course of events at Dunkirk.] In 1966, Lionel Ellis, the British official historian, wrote that the defence of Calais and Boulogne diverted three panzer divisions from the French First Army and the BEF; by the time that the Germans had captured the ports and reorganised, III Corps (Lieutenant-General Ronald Adam) had moved west and blocked the routes to Dunkirk.

In 2005, Karl-Heinz Frieser wrote that the Franco-British counter-attack at Arras on 21 May, had a disproportionate effect on the Germans, because the German higher commanders were apprehensive about flank security. Ewald von Kleist, the commander of Panzergruppe Kleist perceived a “serious threat” and informed Colonel-General Franz Halder (Chief of the General Staff of OKH), that he had to wait until the crisis was resolved before continuing. Colonel-General Günther von Kluge, the 4th Army commander, ordered the tanks to halt, an order supported by Rundstedt, the commander of Army Group A. On 22 May, when the Anglo-French attack had been repulsed, Rundstedt ordered that the situation at Arras must be restored before Panzergruppe Kleist moved on Boulogne and Calais. At Oberkommando der Wehrmacht (OKW, High Command of the Armed Forces) the panic was worse and Hitler contacted Army Group A on 22 May, to order all mobile units to operate either side of Arras and further west; infantry units were to operate to the east of the town.

The crisis among the higher staffs of the German army was not apparent at the front and Halder formed the same conclusion as Guderian, the real threat was that the Allies would retreat to the channel coast and a race for the channel ports began. Guderian had ordered the 2nd Panzer Division to capture Boulogne, the 1st Panzer Division to take Calais and the 10th Panzer Division to seize Dunkirk, before the halt order. Most of the BEF and the French First Army were still 62 miles (100 km) from the coast but despite delays, British troops were sent from England to Boulogne and Calais just in time to forestall the XIX Corps panzer divisions on 22 May. Had the panzers advanced at the same speed on 21 May as they had on 20 May, before the halt order stopped their advance for 24 hours, Boulogne and Calais would have fallen easily. (Without a halt at Montcornet on 15 May and the second halt on 21 May, after the Battle of Arras, the final halt order of 24 May would have been irrelevant, because Dunkirk would have already fallen to the 10th Panzer Division.)

Casualties

Calais in ruins after the siege

In 1952, Guderian wrote that the British surrendered at 4:45 p.m. and that 20,000 prisoners were taken, including 3,000–4,000 British troops, the remainder being French, Belgian and Dutch, most of whom had been “locked in cellars by the British” after they had ceased to fight. In 2006, Sebag-Montefiore wrote that German casualties killed and wounded during the battle were not recorded but probably amounted to several hundred. Brigadier Nicholson was never able to give his views as he died in captivity on 26 June 1943 aged 44. Lieutenant-Colonel Chandos Hoskyns, commanding the Rifle Brigade, was mortally wounded on 25 June and died in England. Capitaine de frégate Charles de Lambertye, commanding the French contingent, died of a heart attack while touring the defences of Calais on 26 May. German situation reports recorded 160 aircraft lost or damaged from 22–26 May; the RAF lost 112 aircraft.

Subsequent operations

Modern example of a Westland Lysander (Shuttleworth Flying Day, June 2013) 9122290625

When the evacuation of troops was stopped, the Vice-Admiral Dover, Vice-Admiral Bertram Ramsay sent smaller craft to remove surplus men and the launch Samois, made four journeys to take wounded back to England. The yacht Conidaw entered the harbour on 26 May and ran aground. The yacht was refloated on the afternoon tide and brought away 165 men, as other vessels took other casualties. During the night of 26/27 May Ramsay had the motor yacht Gulzar painted with red crosses and sailed to Calais to recover wounded. At 2:00 a.m., Gulzar entered the harbour and docked at the Gare Maritime pier; a party went ashore and were fired on.

The party ran back and the boat cast off, as Gulzar was fired on from around the harbour. British troops on the eastern jetty called out and shone torches, which were seen by the crew and the Gulzar turned back, the fugitives jumped aboard, the yacht still under fire and escaped. On 27 May, the RAF responded to a War Office request the evening before, to drop supplies to the Calais garrison, by sending twelve Westland Lysander aircraft to drop water at dawn. At 10:00 a.m. 17 Lysanders dropped ammunition on the Citadel, as nine Swordfish of the FAA bombed German artillery emplacements. Three Lysanders were shot down and a Hawker Hector was damaged.

Commemoration
Calais 1940 was awarded as a battle honour to the British units in action.

Orders of battle

Data from Routledge (1994) Farndale (1996) and Ellis (2004) unless indicated.

XIX Corps

Panzergruppe Kleist (General of Cavalry Ewald von Kleist, Chief of Staff: Brigadier-General Kurt Zeitzler)

XIX Korps (General of Cavalry Heinz Guderian)

1st Panzer Division (Major-General Friedrich Kirchner)

2nd Panzer Division (Major-General Rudolf Veiel)

10th Panzer Division (Major-General Ferdinand Schaal)

XLI korps (Major-General Georg-Hans Reinhardt)

6th Panzer Division (Brigadier-General Werner Kempf)

8th Panzer Division (Colonel Erich Brandenberger)

Calais garrison

30th Motor Brigade (Brigadier C. N. Nicholson)

1st Battalion, Rifle Brigade (Prince Consort’s Own)

2nd Battalion, King’s Royal Rifle Corps

7th Battalion, King’s Royal Rifle Corps (1st Battalion, Queen Victoria’s Rifles)

3rd Royal Tank Regiment (under command)

229th Anti-Tank Battery (less a troop) 58th Anti-Tank Regiment, RA (under command)

6th Heavy Anti-Aircraft Battery, 2nd Heavy Anti-Aircraft Regiment, RA (under command)

172nd Light Anti-Aircraft Battery, 58th (Argyll and Sutherland Highlanders) Light Anti-Aircraft Regiment, RA (under command)

1st and 2nd Searchlight Batteries, 1st Searchlight Regiment, RA (under command)

Elements, 2nd Searchlight Regiment, RA

Notes
The division had lost more than half its armoured vehicles and one third of its transport to battle casualties, mechanical breakdown and attacks by RAF bombers since the Battle of Stonne a week earlier and Schaal complained that his division was tired but was over-ruled.

Foreman listed 13 claims for aircraft destroyed by 54 Squadron on 24 May and two damaged, all Bf 109s, though this maybe a printing error.
The 48th Division was never ordered to march on Calais, being used in the defence of Cassel and Hazebrouck near Dunkirk.

Nicholson sent the reply “The answer is no, as it is the British Army’s duty to fight as well as it is the German’s”

The 10th Panzer Division war diary recorded the reply:

1. The answer is no as it is the British Army’s duty to fight as well as it is the German’s.

2. The French captain and the Belgian soldier having not been blindfolded cannot be sent back. The Allied commander gives his word that they will be put under guard and will not be allowed to fight against the Germans.
Airey Neave was a troop commander in the 1st Searchlight Regiment, Royal Artillery when he was taken prisoner.

The Wording on this Plaque

In grateful memory of the 19 Officers and 185 Warrant Officers, NCOs and Men of The King’s Royal Rifle Corps, The Rifle Brigade and Queen Victoria’s Rifles who fell in the defence of Calais, 23-26 May 1940. This temporary memorial was unveiled by Major General Erskine during a simple ceremony of Remembrance held near this spot on 26 May 1945.’ — in Winchester, Hampshire.

Sourced from Wikipedia

Picture by Bundesarchiv, 

R.I.P Fred Boomer-Hawkins

 Articles  Comments Off on R.I.P Fred Boomer-Hawkins
May 142020
 

The family of a Chelsea Pensioner have thanked dozens of people who lined the streets to applaud his funeral procession.
Fred Boomer-Hawkins died aged 75 last month after contracting coronavirus.

Sadly, his funeral at Colchester Crematorium had to be limited in numbers due to social distancing regulations, meaning only close family could attend.

But following an appeal by Peter Dutch on community Facebook community group the Colchester Anti-Loo Roll Brigade and in the Gazette, people lined the streets to applaud and pay their respects.

Soldiers from the Military Corrective Training Centre, in Berechurch Hall Road,where Fred served for seven years, and Royal Mail workers were among those who paid their respects.

Fred’s son Terry, 49, issued a heartfelt thanks on behalf of himself, sister Anita and the whole family.
He said: “We were overwhelmed by the support of the people of Colchester.

“From the very start on Adelaide Drive people where at the side of the road clapping and this continued along the whole route all the way to the crematorium.

“We would like to offer special thanks to the postal workers of the Royal Mail who were out in numbers along Mersea Road, the soldiers of the MCTC who formed a guard of honour on Berechurch Hall Road, the soldiers from Merville Barracks and the rehabilitation centre who were stood to attention on Berechurch Road and the Military Police who were out in numbers by Abbey Fields.

“Seeing so many people along the route offering their support was a great comfort to the family and they are very grateful to everyone, you all helped ease the sadness of only ten people being able to attend the funeral.

“Without the kindness of so many, Fred’s final journey would not have been fitting.”

The dedicated veteran started his Army career as a Royal Green Jacket and his service took him all over the globe.

His passion for travel continued throughout his life, and he also loved boxing, scooping numerous awards during his forces days and continuing to coach and referee after he hung up his own gloves.

As well as his three children, he leaves three step-children, nine grandchildren and six great-grandchildren.

Credits too

The Chad

Nugent @ChadNugent

Reporter